November 28, 2025 · Sewing Society · 5 min read · Learn to Sew
Disclosure: As an Amazon Associate, we earn from qualifying purchases. Some links in this post may be affiliate links.
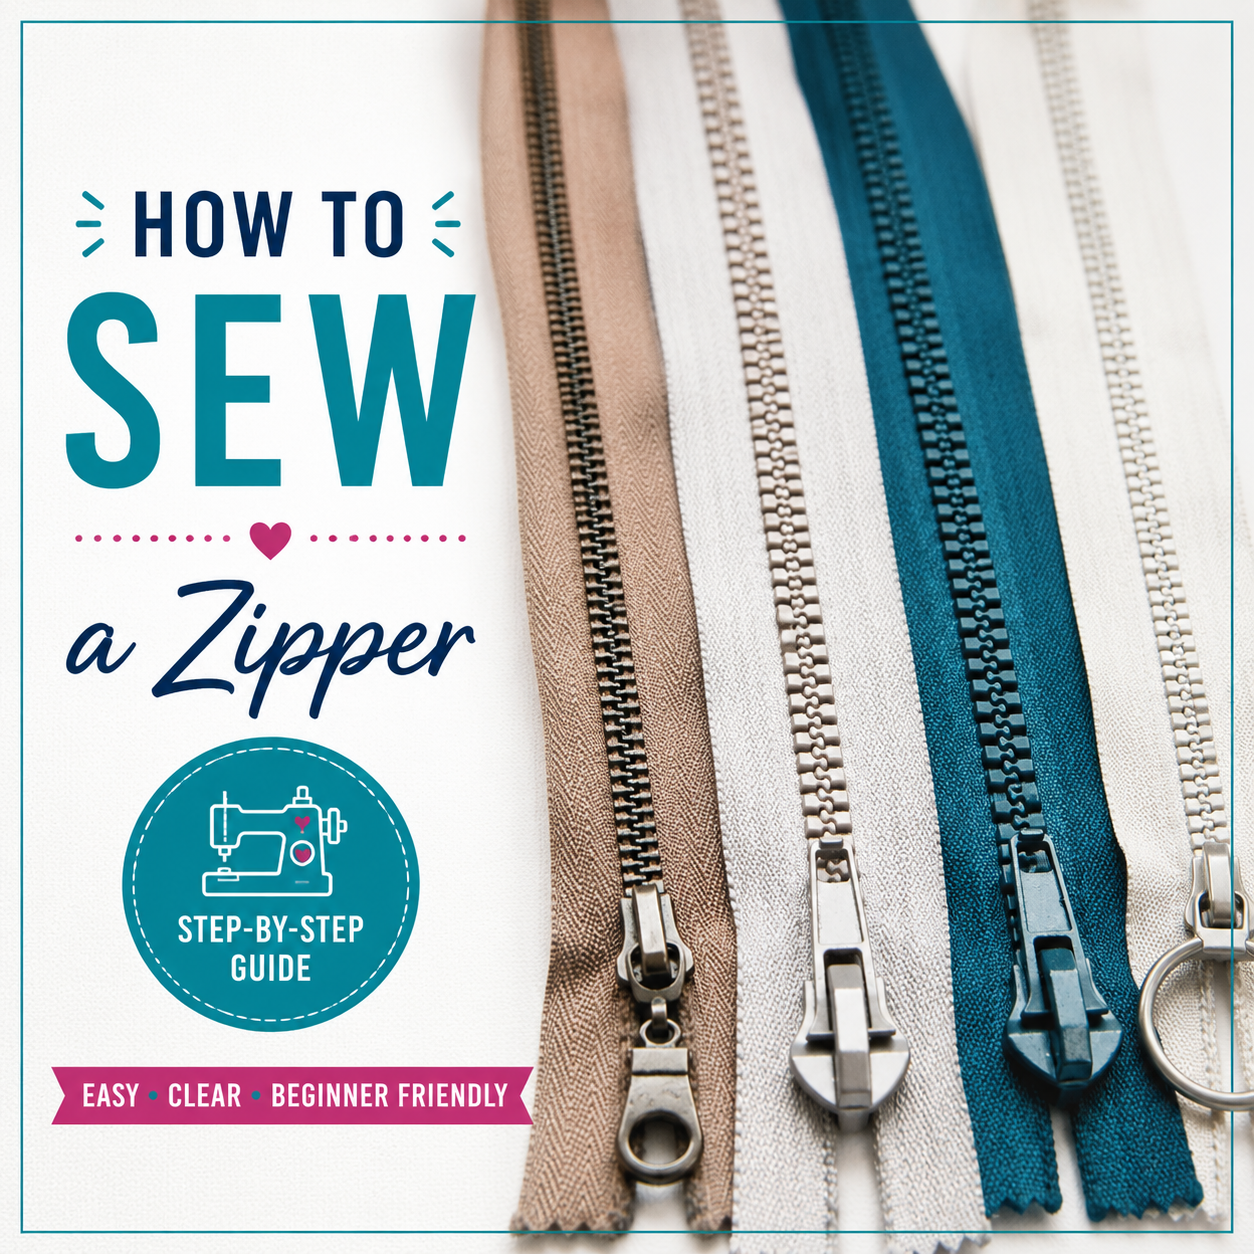
The Complete Guide to Sewing Zippers (Types, Sizes, and How to Sew Them)
Zippers look intimidating but they really only require straight stitching. The key is knowing which type to use and how to handle it correctly. This complete guide covers the four zipper types, three zipper styles, how to shorten a zipper, and how to sew one in, so you can tackle any pattern that calls for one.
Zippers show up in all kinds of sewing projects: jackets, pants, dresses, bags, and more. They give your finished projects a clean, polished look, and once you understand them, they really are not that scary!
If you've been avoiding patterns with zippers, here's the truth: zippers only require straight stitching. The trickiest part is just choosing the right one for your project. This guide covers everything you need to know.
The Four Types of Zippers
Zippers come in lots of colors and styles, but there are four main types you'll encounter in sewing.
Closed-Bottom Zippers These have a stop across the bottom of the teeth that keeps the zipper pull from sliding off. They're used in pants, dresses, bags, and anywhere the two sides of the zipper don't need to completely separate.
Separating Zippers These come completely apart at the bottom, which is what makes them perfect for the front of coats and jackets. When you unzip all the way, the two sides detach entirely.
Invisible Zippers Invisible zippers have very fine teeth on the back side of the zipper tape. When sewn correctly, they disappear completely into your seam with just a small pull visible. They're most commonly used in formalwear and dresses.
Continuous Roll Zippers Also called zipper by the roll, these come on a long roll and can be cut to any length you need. They come with multiple zipper pulls and are great for projects that require a custom or very long zipper.
The Three Zipper Styles
Both closed-bottom and separating zippers come in three different styles. Invisible and continuous roll zippers are almost always made from nylon coil.
Molded Plastic These have large, chunky interlocking teeth made by melting plastic directly onto the zipper tape. They're durable and work well in jackets and bags, but they're not flexible enough for most garment sewing.
Coil Coil zippers are lightweight, smooth, and flexible, made from nylon or polyester. They're stitched or woven into the tape and are the most versatile option for garment sewing. These are what you'll reach for most often.
Metal Metal zippers have the most durable teeth, but they can be prone to sticking. They come in various finishes like brass, nickel, rose gold, and gunmetal, which makes them a great choice when the zipper is meant to be a visible design detail.
Zipper Sizes
Zipper sizes are expressed as a number, which refers to the width of the teeth in millimeters. The two most common sizes for garment sewing are #3 and #5.
Your pattern will usually tell you which size to use, but as a general rule: smaller zippers work best for skirts, pants, and dresses, while larger zippers are better suited to jackets and bags.
How to Shorten a Zipper
Whenever possible, buy a zipper that's the right length for your project. But if yours is a little too long, shortening it is not a big deal.
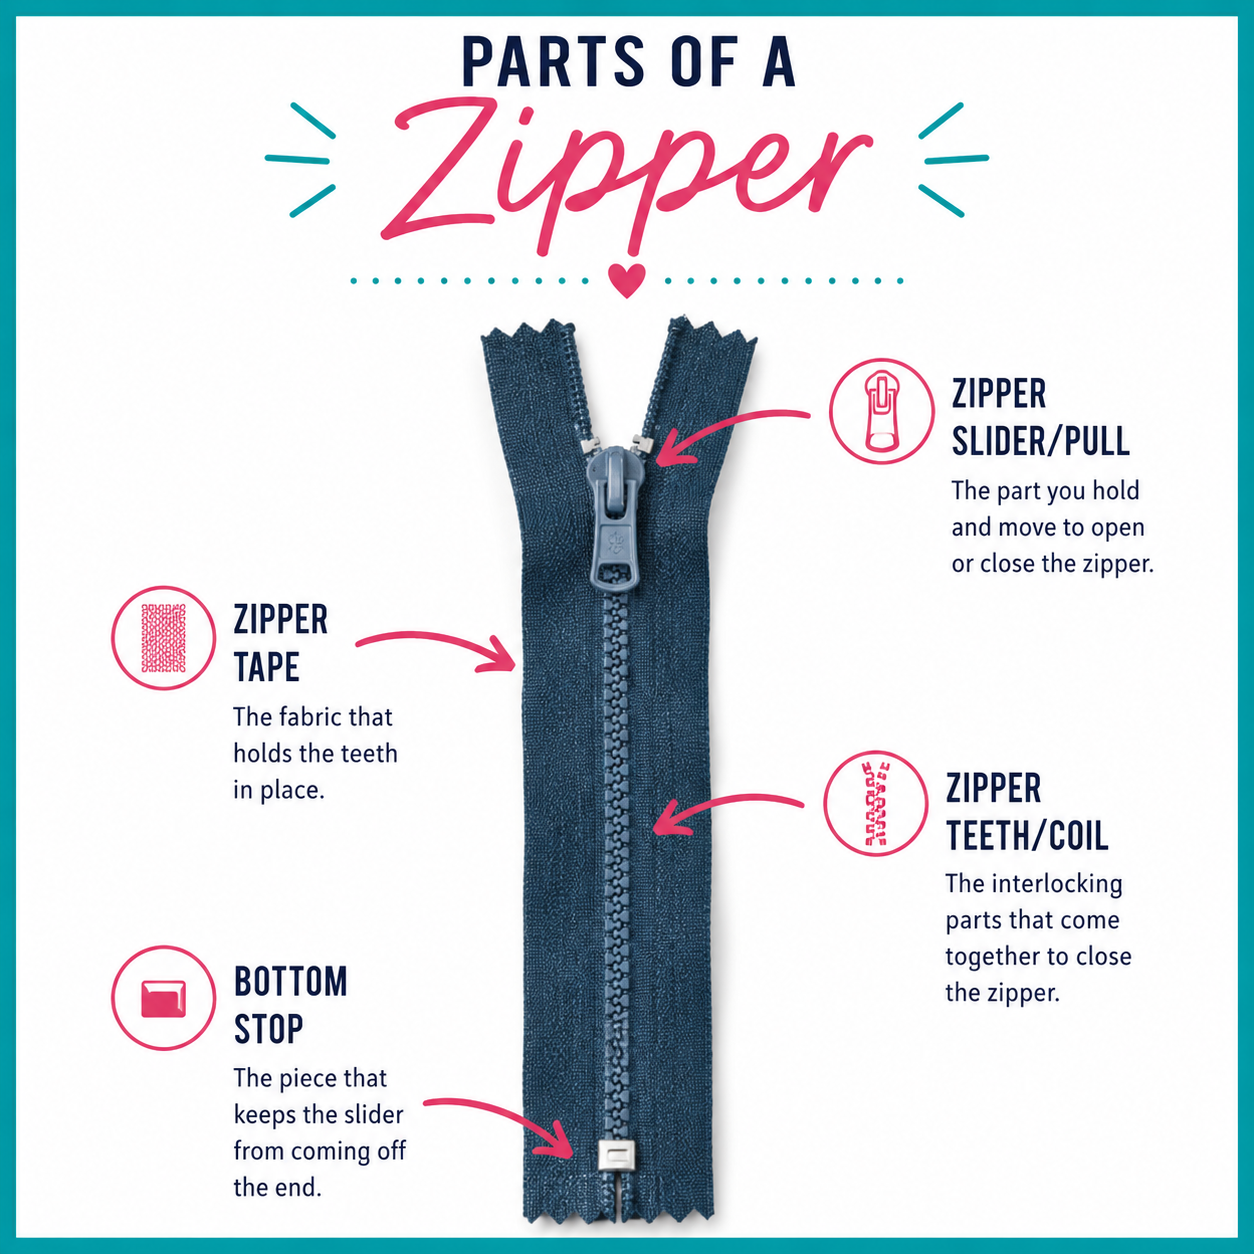
One important thing to know: zippers are measured from the top stop to the bottom stop, so cut your zipper 1 to 2 inches longer than you need to give yourself a little tail to work with.
Coil zippers: Simply cut across the bottom with scissors, then sew a bar tack across the teeth at the cut end to create a new stop.
Molded plastic zippers: You can technically cut them the same way, but the chunky teeth can damage your scissors. Try to buy the right length if you can.
Metal zippers: These are shortened from the top, not the bottom. Mark where you need to cut, use pliers or a side cutter to remove a few teeth above that mark, then cut the zipper tape. Never cut directly through metal teeth as they will ruin your scissors.
After cutting any zipper, dab a little Fray Check on the cut end of the tape to prevent fraying.
How to Sew a Zipper
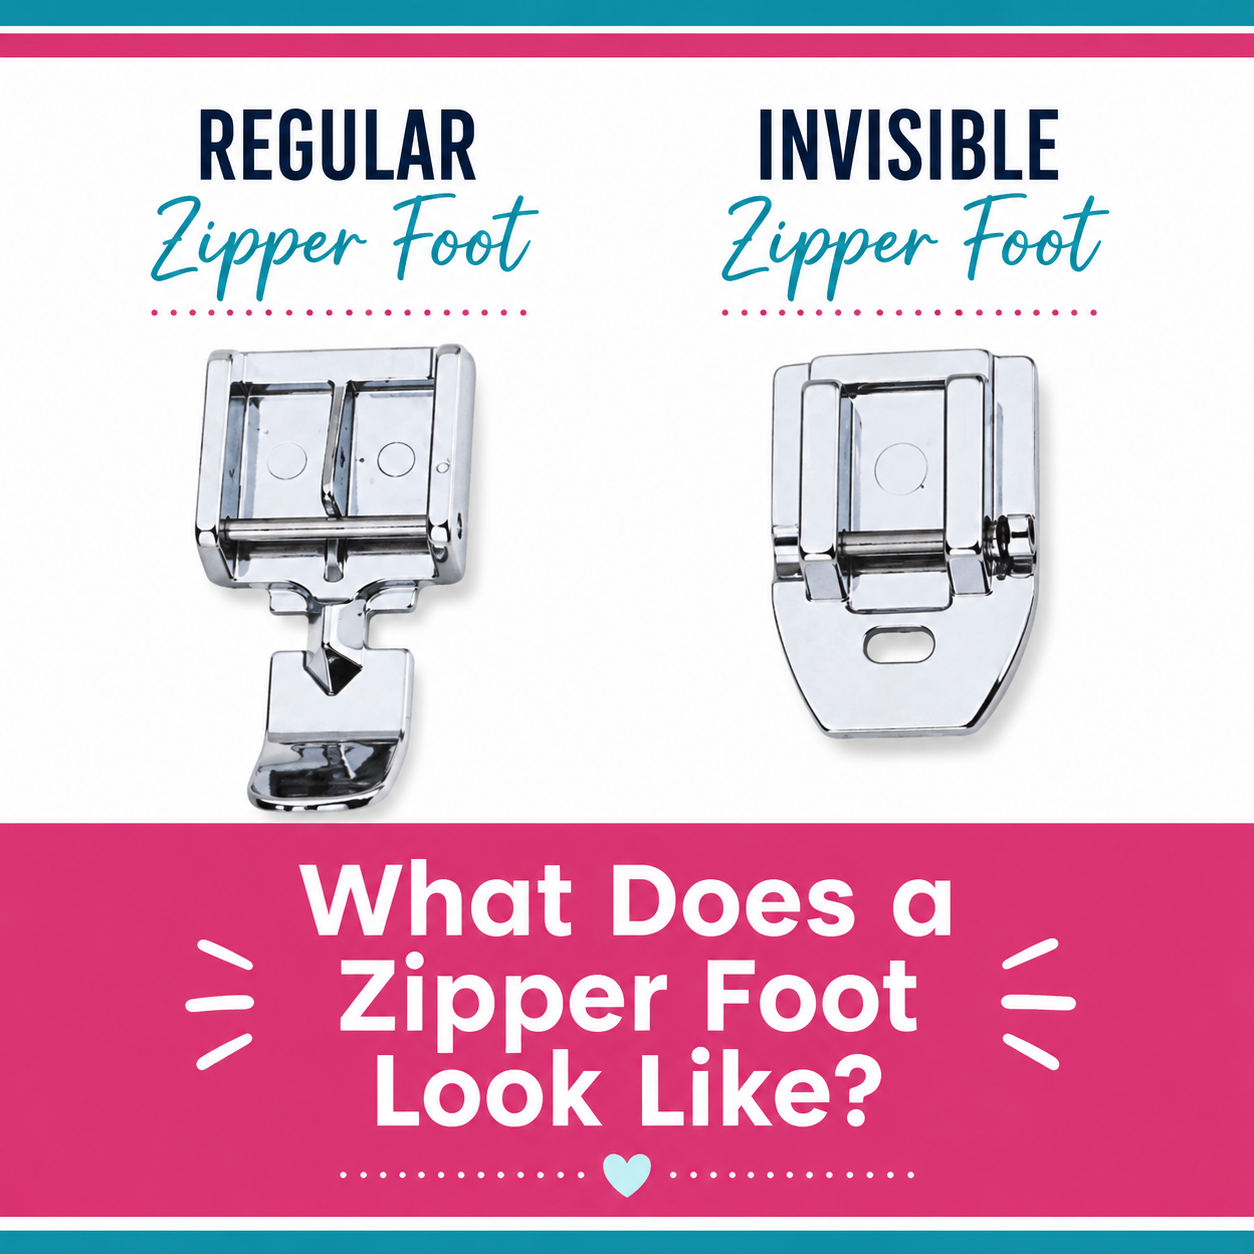
No matter which type of zipper you're sewing, you'll need a zipper foot. Most sewing machines come with one. It's designed to glide right next to the zipper teeth so you can stitch closely and in a straight line.
A few things that make sewing zippers easier:
Wonder Tape is a double-sided, water-soluble tape that holds your zipper in position while you sew. It washes away completely and is so much easier than pins.
Sewing clips are also handy for holding the zipper against your fabric without distorting it.
To sew the zipper, line up the zipper tape with the edge of your fabric and sew a straight stitch along the full length with your zipper foot. Repeat on the other side. Most zipper feet can be positioned on either the right or left side, which lets you stitch in the same direction on both passes.
How to Sew a Regular (Closed-Bottom or Separating) Zipper
Finish the raw edges of your fabric before you begin.
Press the seam allowance to the wrong side along both edges where the zipper will be inserted.
Cut a strip of Wonder Tape and place it along the right side of the zipper tape on one side. Remove the paper backing and press the folded fabric edge against it to hold the zipper in position.
Attach your zipper foot to your sewing machine and position it next to the zipper teeth.
Stitch along the first side of the zipper from top to bottom, keeping your stitching straight and close to the teeth.
Repeat steps 3 through 5 on the other side of the zipper.
At the bottom of the zipper, pivot and sew a short horizontal bar tack across the bottom to reinforce the base.
Open and close the zipper to make sure it runs smoothly and your stitches are not catching the teeth.
A Few Tips for Better Results
Always keep the zipper closed while you stitch both sides. This ensures everything lines up properly.
Sew slowly around the zipper pull. When you get close to it, stop with your needle down, lift the presser foot, slide the pull past the needle, lower the foot, and continue sewing.
Press gently when done, using a press cloth to protect the zipper teeth from direct heat.
One important note: never sew over metal zipper teeth. They can break your needle.
 Pin It
Also Read: How to Sew an Invisible Zipper
Zippers really are not difficult once you understand the basics. Pick the right type, prep it correctly, and sew slowly the first time. You will be surprised at how quickly they become second nature!
Related reading: A Beginner's Guide to Laying Out Sewing Pattern Pieces
AI Sewing Coach
Create a free account to chat with our AI Sewing Coach — trained to help with sewing techniques, troubleshooting, projects, fabric questions, and more!
Comments
Comments are screened by an AI moderator for spam and inappropriate content.
Sign in to join the conversation.
Loading comments…