October 9, 2025 · Sewing Society · 3 min read · Sewing Machine Help & Troubleshooting, Sewing Machines
Disclosure: As an Amazon Associate, we earn from qualifying purchases. Some links in this post may be affiliate links.
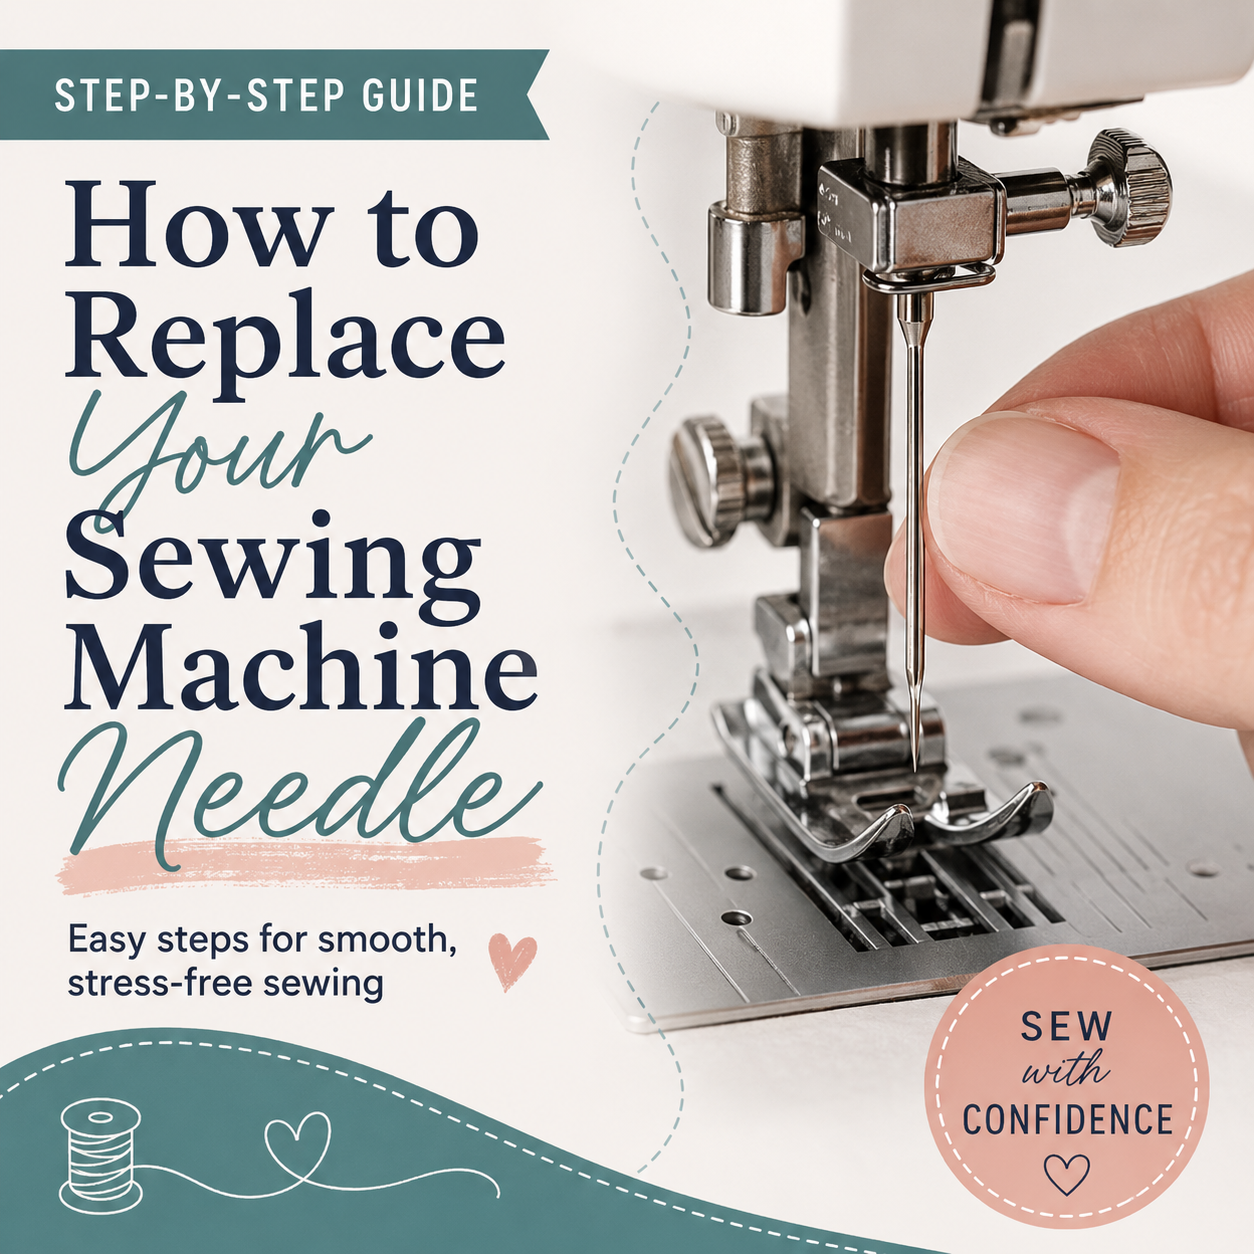
How to Replace the Needle on Your Sewing Machine (Step by Step)
Changing your sewing machine needle is easier than you think, and it makes a bigger difference in your stitch quality than most sewists realize. Here's a clear, step-by-step guide to replacing your needle in under two minutes, plus tips on how often to do it and the signs that it's time for a fresh one.
Replacing a sewing machine needle is one of those tasks that sounds more intimidating than it actually is. Once you've done it once, it takes about 60 seconds. The process is essentially the same across almost every sewing machine, so these steps will work whether you have a beginner machine or a high-end model.
If your needle keeps breaking and you're not sure why, check out this post: Why Does the Needle Keep Breaking on My Sewing Machine?
What You'll Need
Before you start, grab two things:
A replacement needle — make sure it's the right type and size for your project (more on that below)
The small screwdriver that came with your sewing machine
I recommend keeping sewing machine needles on hand in bulk. They're inexpensive and having a variety of types and sizes available means you're never stuck using the wrong needle for a project.
Need help choosing the right needle? Read: Everything You Need to Know About Sewing Machine Needles
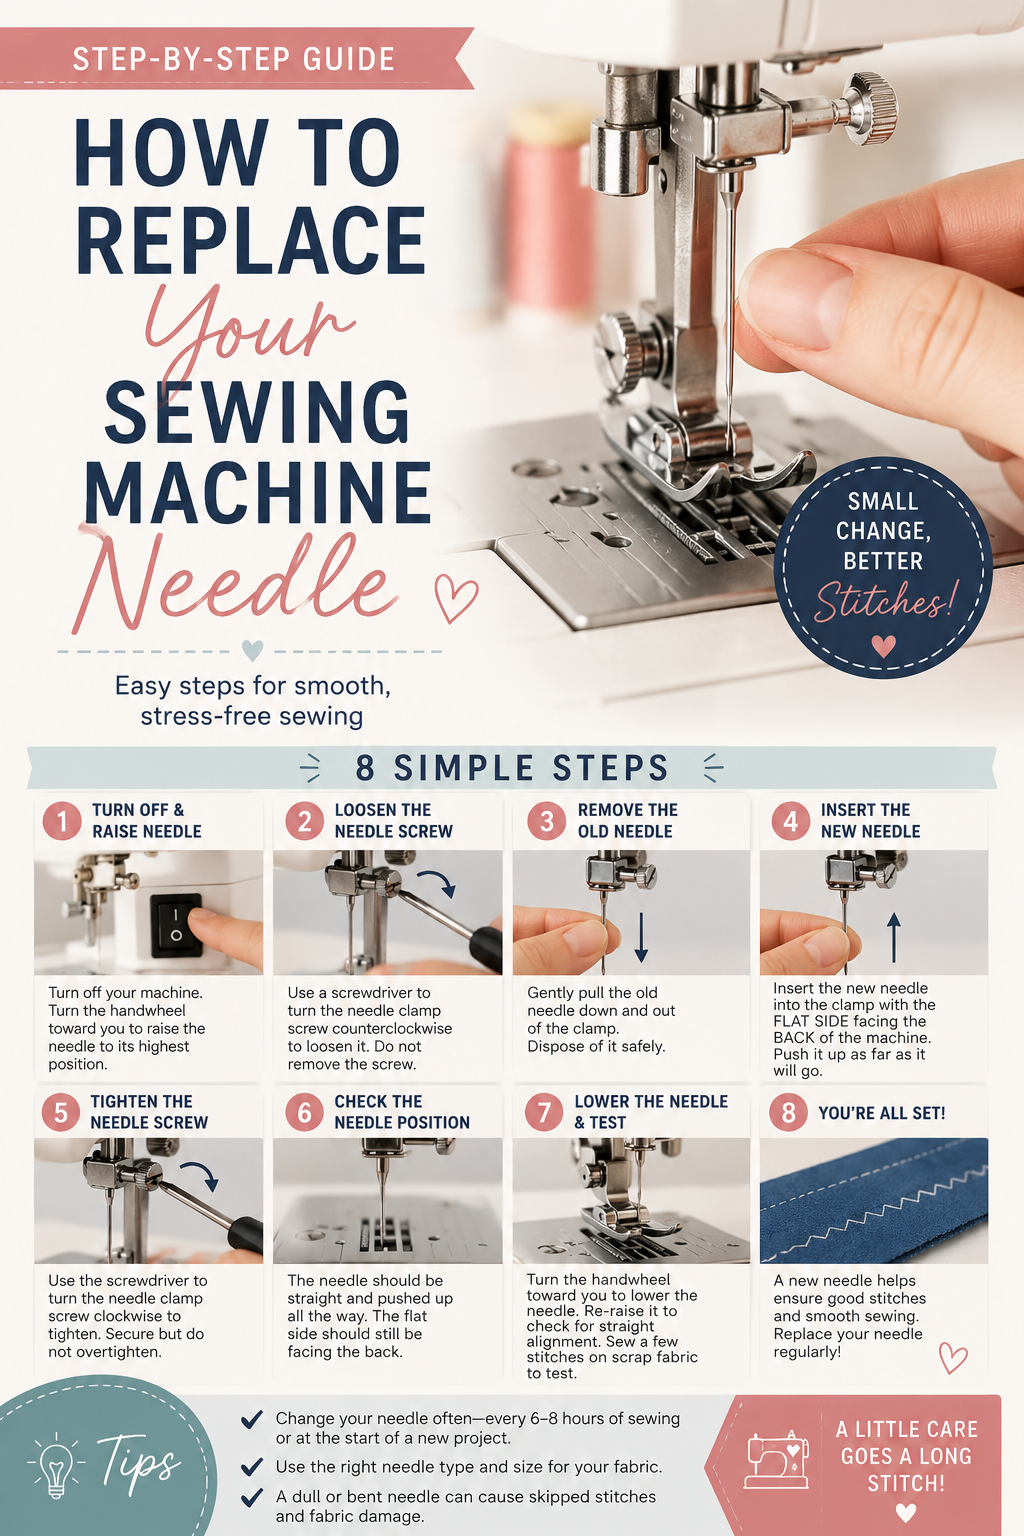
Step-by-Step: How to Replace Your Sewing Machine Needle
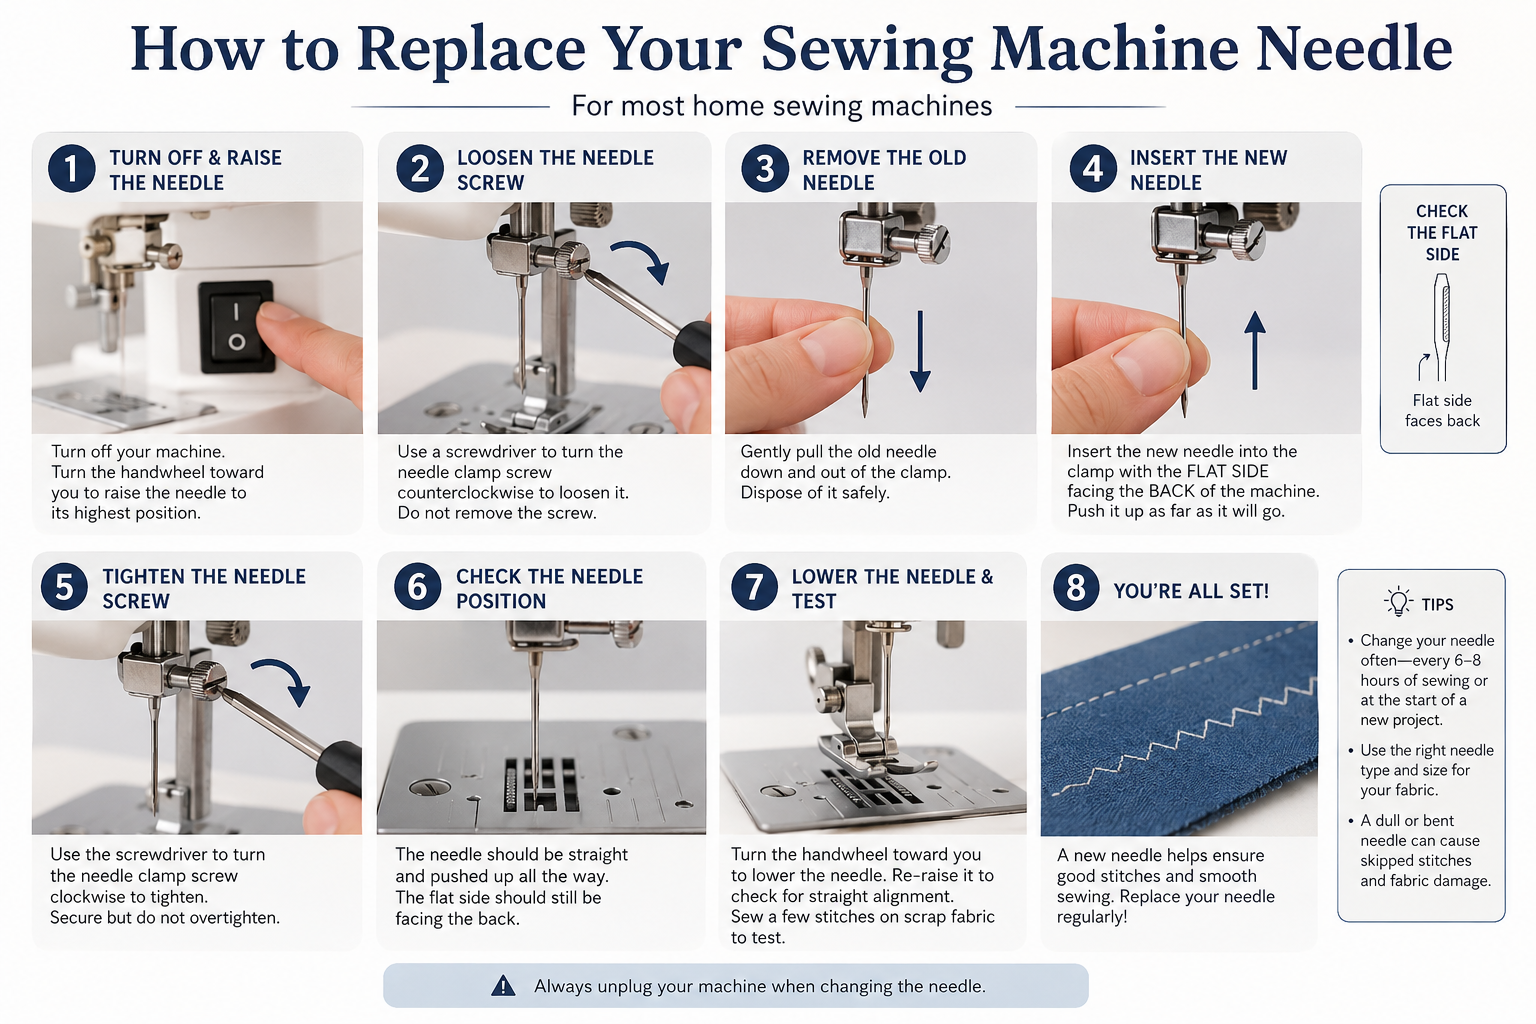
Step 1: Choose the right needle. Sewing machine needles come in different types and sizes, and using the right one for your fabric makes a real difference in your stitch quality. Take a moment to select the appropriate needle before you start.
Step 2: Turn your machine off. Always power down your machine before changing the needle. You don't want to accidentally hit the foot pedal mid-swap.
Step 3: Raise the needle to its highest position. Use the handwheel on the side of your machine to raise the needle all the way up if it isn't already. This gives you easy access and plenty of room to work.
Step 4 (Optional): Cover the needle hole. Place a small scrap of paper under the presser foot to cover the opening in the throat plate. This simple trick prevents the old needle from falling into the machine if you drop it — which has happened to me, and retrieving it is no fun!
Step 5: Loosen the needle clamp. Locate the needle clamp screw, which is typically positioned just to the right of the needle. Use your screwdriver to loosen it. You don't need to remove the screw completely, just enough for the needle to slide free. The old needle should drop right out.
Step 6: Insert the new needle. Every sewing machine needle has a flat side at the top of the shaft. Insert the new needle with the flat side facing away from you (toward the back of the machine), and push it all the way up until it stops. Hold it firmly in place. If you want to make this step even easier, a Needle Inserter Tool is a handy little gadget that grips the needle and helps you position it perfectly.
Step 7: Tighten the needle clamp. While keeping the needle held in place with one hand, use your screwdriver to tighten the needle clamp securely. Give the needle a gentle tug to confirm it's held firmly and sitting straight.
Step 8: Rethread and test. Rethread your machine, then run a few stitches on a scrap of fabric. Listen for any unusual sounds and watch to make sure the needle passes cleanly through the throat plate without hitting anything.
That's it — you're done!
How Often Should You Change Your Sewing Machine Needle?
More often than most people do, honestly. Schmetz — one of the most trusted needle brands in the industry — recommends changing your needle every 8 hours of sewing. Since almost no one tracks their sewing time that precisely, a more practical approach is to change your needle at the start of every new project. It's easy to remember, ensures you always have a fresh needle, and gives you a natural moment to confirm you're using the right type for your fabric.
Beyond that schedule, here are the signs that your needle needs to be replaced right away:
The needle is visibly bent or damaged
Your upper thread keeps snapping or breaking
You're hearing a popping or thumping sound while you sew
You're getting skipped or uneven stitches
The fabric feels like it's resisting the needle
 Pin It
You're switching to a different fabric that requires a specific needle type or size
A fresh needle costs almost nothing, and a bad needle can ruin an entire project. When in doubt, just replace it.
Have questions about sewing machine needles or troubleshooting stitch issues? We’ve trained our AI Sewing Coach to help. Ask it anything!
AI Sewing Coach
Create a free account to chat with our AI Sewing Coach — trained to help with sewing techniques, troubleshooting, projects, fabric questions, and more!
Comments
Comments are screened by an AI moderator for spam and inappropriate content.
Sign in to join the conversation.
Loading comments…