August 10, 2025 · Sewing Society · 7 min read · Learn to Sew
Disclosure: As an Amazon Associate, we earn from qualifying purchases. Some links in this post may be affiliate links.
How to Sew a Straight Stitch: A Complete Guide for Beginners
The straight stitch is the foundation of almost every sewing project you'll ever make — but if your stitching keeps wandering, you're probably making one very common mistake. Here's everything you need to know to sew perfectly straight lines from the start.
Learning to sew a straight stitch is one of the first and most important skills you'll build as a beginner sewist. It sounds simple — and it is, once you know the tricks — but if you've ever watched your stitching wander all over the place, you know it takes a little practice and the right technique to get it right.
In this guide, I'll walk you through everything you need to know: how to set up your machine, where to look as you sew, how to use your seam guides, common mistakes to avoid, and how to practice until your stitches are perfectly straight every time.
What Is a Straight Stitch?
The straight stitch is exactly what it sounds like — a single, straight line of stitching. It's the most basic stitch on any sewing machine, and it's also the most used. It is the foundation of almost every project you'll ever make. Mastering it is non-negotiable.
Most sewing machines include a basic straight stitch with an adjustable stitch length. On many newer computerized sewing machines, you may also see multiple straight stitch options that change the needle position. For example, on the Brother CS7000X, stitch 00 creates a straight stitch with the needle positioned to the left, while stitch 01 creates a straight stitch with the needle in the center position.
Step 1: Set Up Your Sewing Machine
Before you sew a single stitch, make sure your machine is set up correctly:
Select the straight stitch. On most machines, this is stitch #1 or represented by a straight line on the stitch selector dial or screen.
Set your stitch length. For most sewing projects, a stitch length of 2.5mm is a good starting point. For quilting, 2.0–2.5mm is standard. For basting (temporary stitches you'll remove later), use 4.0–5.0mm.
Use the right needle. A universal needle in size 80/12 is a good all-purpose choice for most woven fabrics. A dull or wrong needle is one of the most common causes of uneven stitching.
Check your thread tension. If your tension is off, your stitches will look loopy on the top or bottom. Most machines sew well at the default tension setting (usually 4–5), so don't adjust it unless you're having problems.
Step 2: Know Where to Look
This is the single biggest tip I can give you, and it's the one most beginners get wrong!
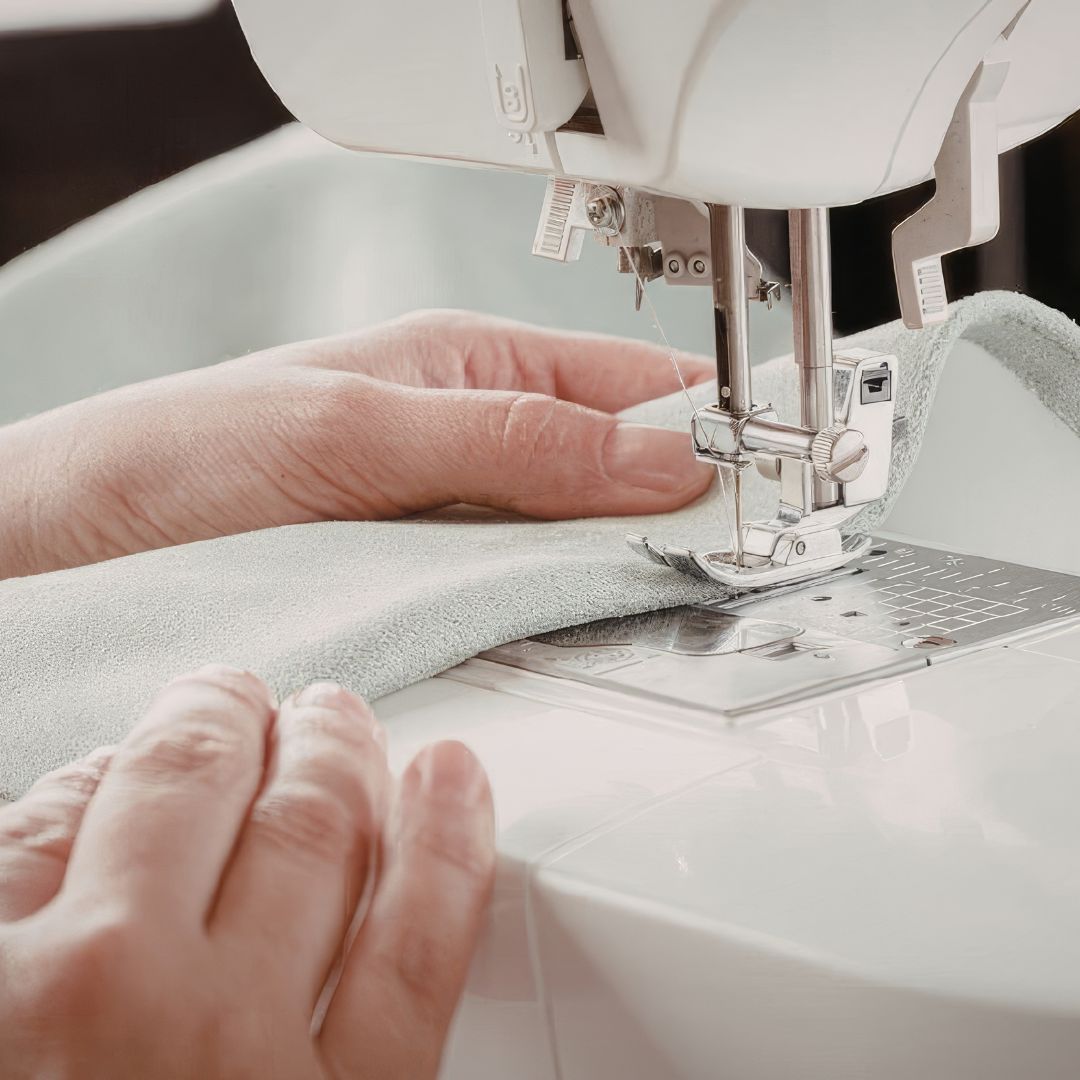
Don't stare at your needle. It feels natural to watch the needle going up and down, but this causes your stitching to drift because you're not paying attention to where your fabric is going.
Instead, look at the edge of your fabric and keep it lined up with one of the seam allowance markings on the needle plate (the metal plate underneath your presser foot). Those markings tell you exactly how far your stitch line is from the edge of your fabric.
Think of it like driving a car — you don't stare at the hood. You look ahead at the road.
Step 3: Choose the Right Seam Allowance
Your sewing pattern will tell you which seam allowance to use, but here's a quick reference:
⅝ inch — the standard for garment sewing. Most clothing patterns use this.
½ inch — also common for garments, especially in simpler patterns.
¼ inch — the standard for quilting.
⅜ inch — sometimes used in bags and accessories.
Find the corresponding line on your needle plate and keep the edge of your fabric aligned with it as you sew. If your machine doesn't have clearly marked seam guides, you can use a piece of masking tape or a sticky note as a guide — just place it at the correct measurement and use it as a visual reference.
A quick note: The seam allowance markings on your needle plate are measured from the needle when it is in the center position. Some sewists prefer sewing with the needle in the left position because it provides a wider view of the stitching area. If you choose to do this, be sure to remeasure your seam allowance so you know which guide line to follow for accurate stitching.
Step 4: Sew at a Controlled Speed
Speed is another thing beginners struggle with. Going too fast makes it difficult to keep your fabric aligned, especially around curves or at the start and end of a seam.
You can control the speed of your sewing machine by adjusting the amount of pressure you apply to the foot pedal. Many sewing machines also include a speed control setting that limits how fast the machine can sew, even when the pedal is fully pressed.
If your machine has a speed control slider, set it to a slower speed while you’re learning. If not, use gentle pressure on the foot pedal to keep your stitching slow and steady. Remember, you are in control of the machine’s speed. Slowing down can help you sew straighter seams and build confidence as you practice.
Step 5: Start and End with a Backstitch
At the beginning and end of every seam, you need to secure your stitches so they don't unravel. To do this:
Sew forward 3–4 stitches.
Press the reverse button and sew backward over those same stitches.
Release the reverse button and continue sewing forward.
Repeat this at the end of the seam. This is called backstitching, and it locks your stitches in place so they are not easy to pull apart. Don't skip it!
Tools That Help You Sew Straighter
A few tools can make sewing straight lines much easier, especially when you're starting out:
Magnetic seam guide — This small magnetic tool attaches to your needle plate and acts as a physical barrier to guide your fabric. You set it at your desired seam allowance and simply keep your fabric pressed against it as you sew. It's one of the most helpful beginner tools out there.
Seam guide presser foot — Some presser feet have an adjustable guide attached that you can set to your seam allowance. This is especially helpful for long straight seams.
Painter's tape or masking tape — The simplest and cheapest option. Place a strip of tape on your needle plate at your seam allowance measurement and use it as a visual guide.
Common Mistakes Beginners Make (And How to Fix Them)
Stitching curves instead of straight lines — You're probably watching the needle instead of the fabric edge. Shift your focus and keep your eyes on the seam guide.
Uneven stitch length — Usually caused by going too fast or not feeding the fabric through smoothly. Let the machine do the work and feed the fabric at its own pace — don't push or pull it.
Thread bunching at the start of a seam — Make sure both the top thread and bobbin thread are pulled behind the presser foot before you begin sewing. Holding the thread tails gently for the first few stitches can also help prevent tangling. However, some fabrics can be more difficult to sew at the beginning of a seam. If your machine keeps pulling or “eating” the fabric into the needle plate, try starting about an inch farther into the seam than normal. Sew a few stitches forward, then backstitch to your intended starting point before continuing forward again.
Fabric not moving — Check that your feed dogs are up (they should be for straight stitching) and that your presser foot is lowered before you start sewing.
Stitches skipping — Usually a needle issue. Try replacing your needle — it may be dull, bent, or the wrong type for your fabric.
How to Practice
The best way to get better at straight stitching is simply to practice — a lot. Here are a few ways to do it:
Sew on fabric scraps. Grab any scraps you have lying around and sew lines, following the seam guides on your needle plate. It doesn't matter what it looks like at first — just keep going.
Use my FREE Sewing Practice Sheets. I created printable practice sheets specifically for beginners that you can print out and stitch directly on, just like fabric. They have guidelines printed on them to help you practice sewing straight. Yes, stitching on paper will dull your needle slightly, but you should be changing your needle regularly anyway — after every 8–10 hours of sewing or every project.
Sew rows of stitching on a piece of muslin. Mark lines with a fabric marker or chalk and try to stitch exactly on the line. This is a great way to train your eye and hand coordination.
What to Make Once You've Got It Down
Once your straight stitching is looking good, you're ready to start sewing real projects. The straight stitch is all you need for so many beginner-friendly makes:
Tote bags
Pillowcases
Simple skirts
Patchwork quilt blocks
Fabric bookmarks or keychains
Zippered pouches (once you add a zipper foot)
Start simple, build your confidence, and before you know it, straight stitching will feel completely natural.
The Bottom Line
 Pin It
Sewing a straight stitch comes down to three things: looking at the right place, sewing at a controlled speed, and practicing consistently. It won't be perfect right away, and that's okay. Every sewist has a pile of wonky early projects somewhere. Keep at it and your stitching will improve faster than you think.
Do you have questions about straight stitching or sewing as a beginner? Drop them in the comments — I'd love to help!
Related reading: FREE Printable Sewing Practice Sheets for Beginners
AI Sewing Coach
Create a free account to chat with our AI Sewing Coach — trained to help with sewing techniques, troubleshooting, projects, fabric questions, and more!
Comments
Comments are screened by an AI moderator for spam and inappropriate content.
Sign in to join the conversation.
Loading comments…