September 29, 2025 · Sewing Society · 3 min read · Learn to Sew
Disclosure: As an Amazon Associate, we earn from qualifying purchases. Some links in this post may be affiliate links.
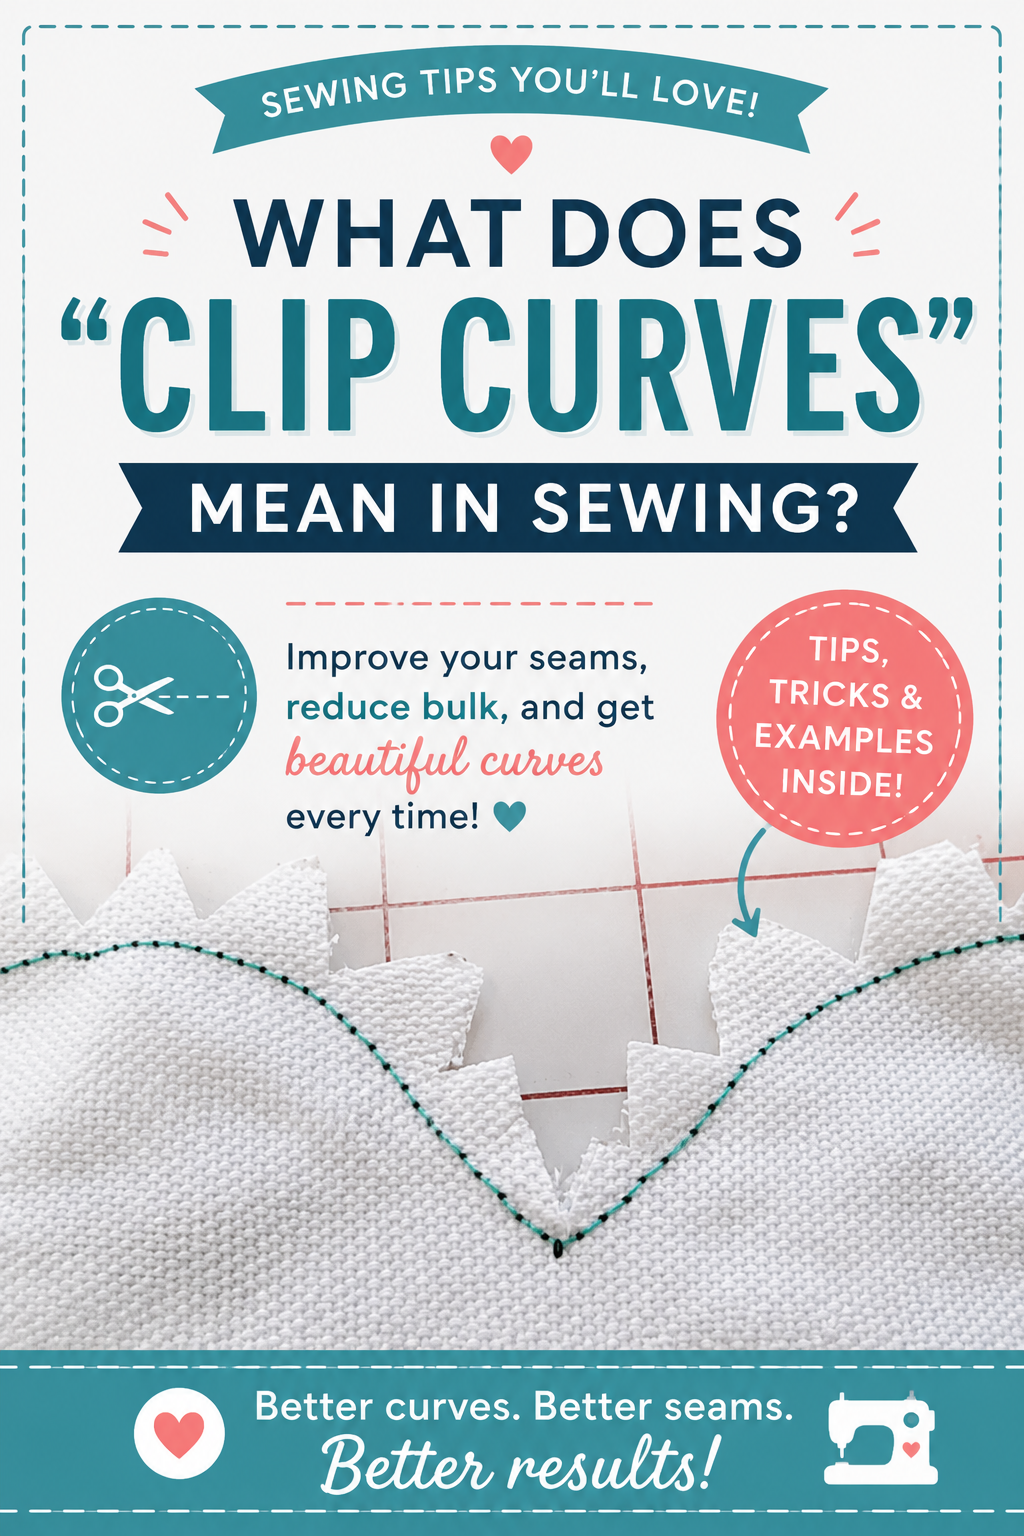
What Does "Clip Curves" Mean in Sewing? (And How to Do It)
"Clip curves" is one of those sewing instructions that beginners often skip, and it shows in the finished result. Clipping your seam allowances along curved seams is a small step that makes a big difference in how professional your sewing looks. Here's a clear, beginner-friendly explanation of what it means, why you do it, and exactly how to clip both convex and concave curves.
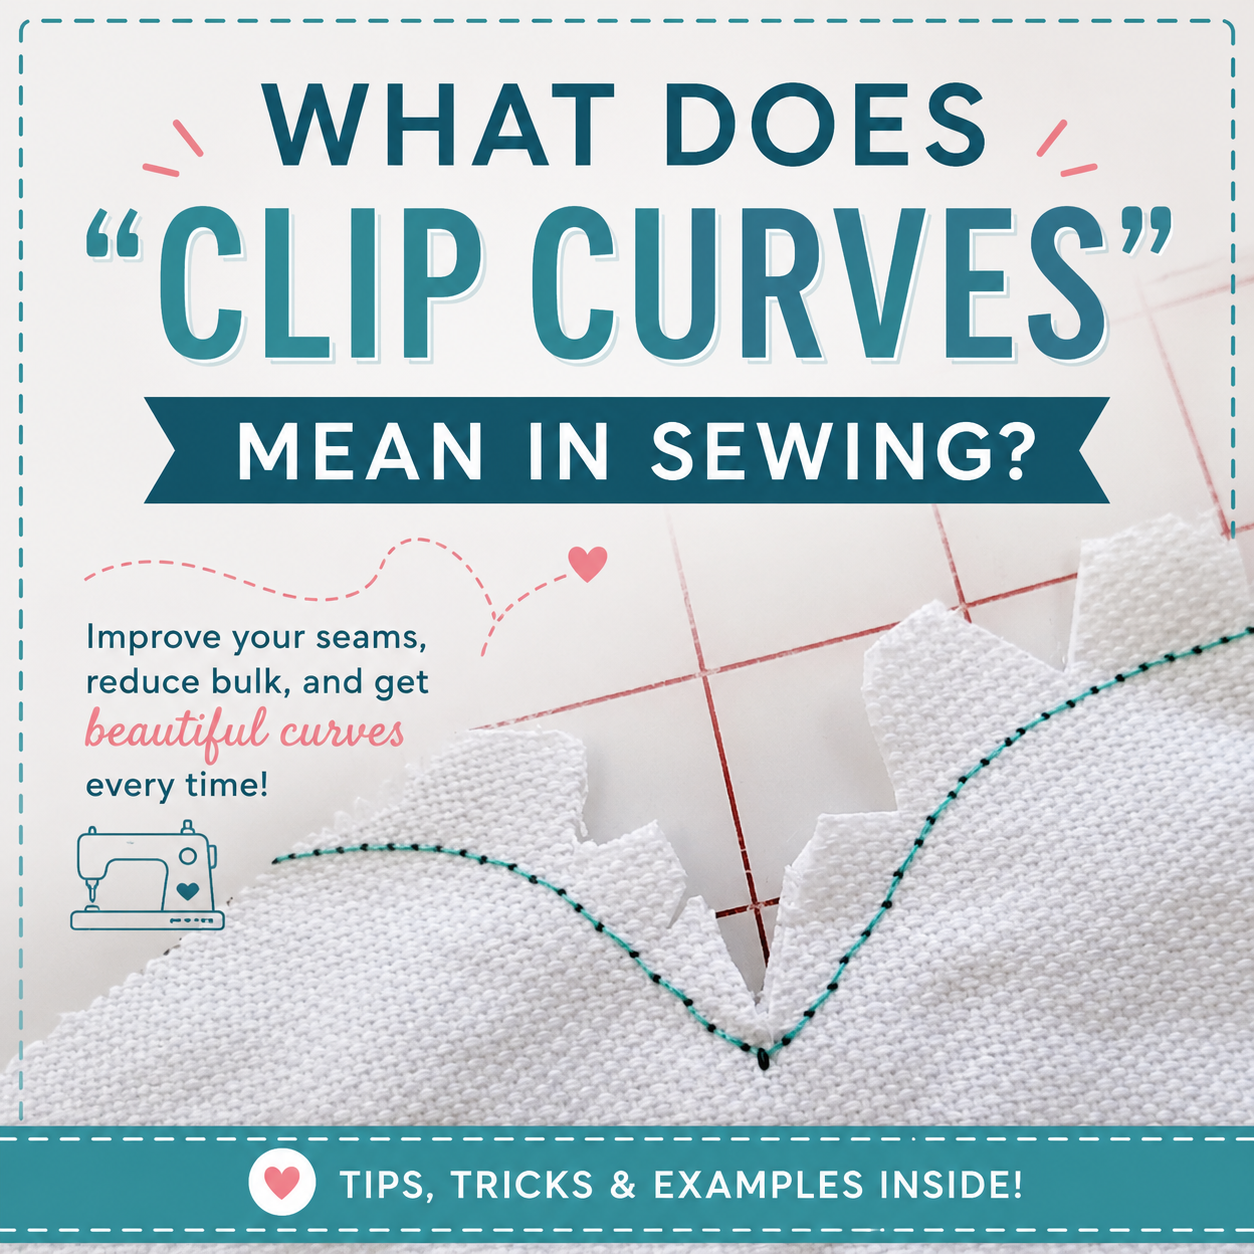
If you've been following a sewing pattern and come to the instruction "clip curves" or "clip corners" without knowing exactly what that means, you're not alone. It's one of those steps that beginners often skip or rush through, and it makes a surprisingly big difference in the finished result.
Here's everything you need to know about clipping curves: what it is, why it matters, and exactly how to do it for both types of curves you'll encounter in sewing.
What Does "Clip Curves" Mean?
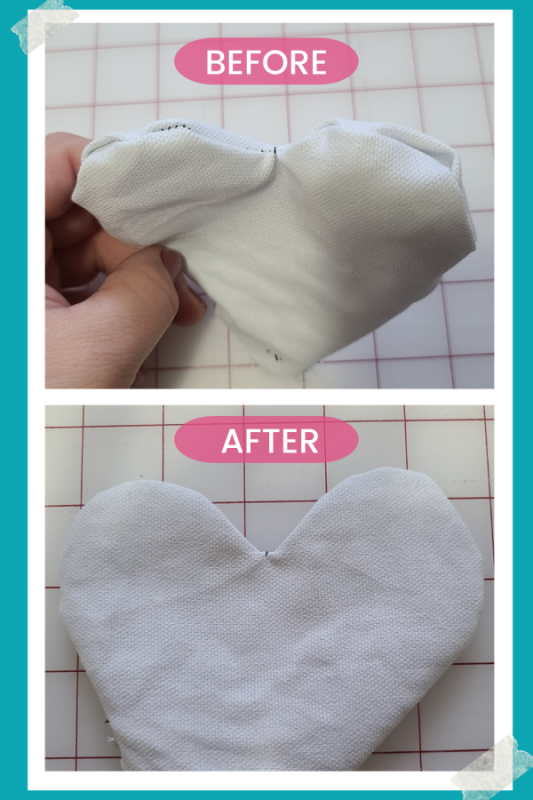
Clipping curves simply means cutting small slits or notches into your seam allowance after sewing a curved seam. The reason you do this is physics: fabric doesn't naturally want to curve. When you sew a curved seam and then turn the piece right side out, the seam allowance on the inside has to compress or stretch to accommodate the shape — and if you don't clip it, you end up with a seam that puckers, pulls, or refuses to lie flat.
Clipping relieves that tension and bulk by removing just enough fabric from the seam allowance to let everything relax into the curved shape smoothly.
You'll encounter this technique most often around necklines, armholes, curved bag edges, and pillow corners — anywhere a seam needs to follow a curve and look clean from the outside.
A Word of Caution Before You Clip
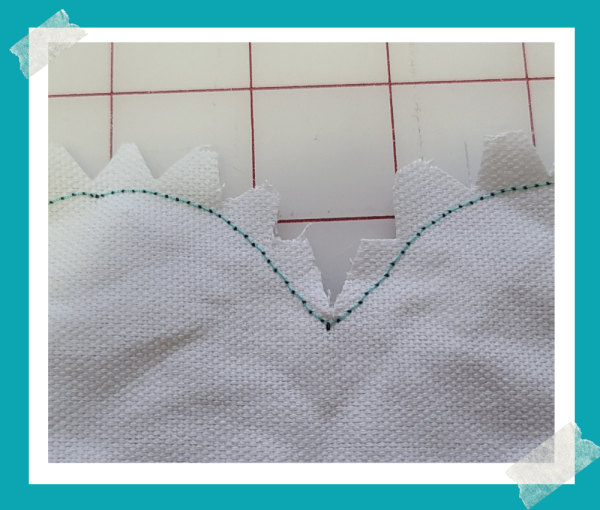
Clipping curves requires a little care. The goal is to cut as close to your stitch line as possible — but not into it. Cutting through your stitches is the one mistake to avoid here.
But, if you accidentally clip into a seam, don't panic. Simply restitch that section of the seam before turning the piece right side out. It happens to everyone at some point.
As a general rule, aim to make each clip as close to your stitching as you dare, and space your cuts approximately every ½ inch along the curve. The closer and more frequent your clips, the smoother and more professional your finished curve will look.
Convex vs. Concave Curves: What's the Difference?
There are two types of curves in sewing, and they're clipped in slightly different ways.
Convex Curves (Curves That Round Outward)
A convex curve rounds outward — think of the outside of a circle or the rounded bottom corners of a bag or pillow. When this type of curve is turned right side out, the seam allowance has too much fabric and needs some removed.
For convex curves: cut triangular notches. Use the tip of your scissors to cut small V-shaped wedges out of the seam allowance, spacing them about every ½ inch. Removing those little triangles of fabric gives the seam allowance more room to spread out evenly on the inside without bunching.
Concave Curves (Curves That Round Inward)
A concave curve rounds inward — like a neckline or an armhole. When this type of curve is turned right side out, the seam allowance doesn't have enough length to stretch around the curve without pulling.
For concave curves: cut straight slits. Simply snip straight into the seam allowance every ½ inch without removing any fabric. These slits allow the seam allowance to spread apart and flex, letting the curve open up smoothly without tension.

How Often Should You Clip?
The ½ inch guideline is a good starting point, but it's just that — a guideline. On a gentle curve, ½ inch spacing may be plenty. On a tighter or more dramatic curve, you'll want to clip more frequently, every ¼ inch or so. The tighter the curve, the more clips it needs to lie flat.
When in doubt, clip a little more generously. More clips mean a smoother curve.
The Best Scissors for Clipping Curves
Precision matters here, which means the scissors you use matter too. Large fabric shears are difficult to control in tight spaces, and an imprecise clip can easily snip into your stitch line.
A small, sharp pair of detail scissors is the ideal tool for this job. They give you much better visibility and control, especially around tight curves and corners. The Singer Detail Scissors are a great choice — sharp, easy to maneuver, and affordable.
 Pin It
Some pinking shears can speed up the clipping process, too. It’s a good tool to have on hand in your sewing space.
Clipping curves is one of those small techniques that separates a homemade-looking project from one that looks truly polished. Once it becomes a habit, you'll do it automatically and you'll notice the difference every time.
Related reading: 4 Fabric Terms You Need to Know
AI Sewing Coach
Create a free account to chat with our AI Sewing Coach — trained to help with sewing techniques, troubleshooting, projects, fabric questions, and more!
Comments
Comments are screened by an AI moderator for spam and inappropriate content.
Sign in to join the conversation.
Loading comments…