Disclosure: This post may contain affiliate links. I earn a small commission when you click a link and make a purchase. Thanks for supporting SewingSociety.com!

Bubble quilts are quite popular, and it’s no surprise why — they’re warm, fluffy, and fun!

I decided to make one of these puff quilts for my one-year-old son. He loves soft things and I thought he’d like rolling around on this puffy blanket. I chose grey and navy blue minky fabric with a star print. I think it turned out super cute! Don’t you think so?

  • Facebook
  • Pinterest
My Finished Puff Quilt

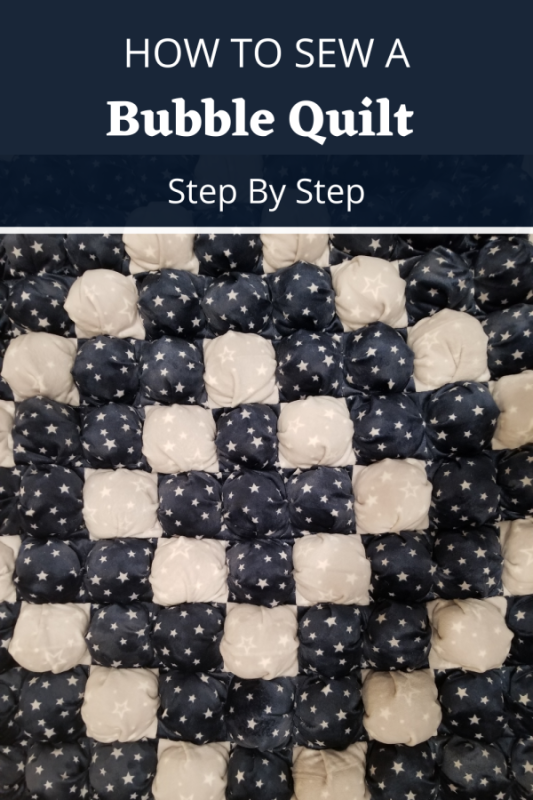
Bubble quilts are a good sewing project for beginners because they’re mostly straight sewing. Just beware that they take several hours to complete, especially if you’re making a large quilt.

I loved the way my bubble quilt turned out, so I decided to show you how to replicate it, step by step. I’ll also point you towards some good puff quilt video tutorials, if you need them.

Let’s get started! Here’s how to make a bubble puff quilt.

Step 1: Buy Your Fabric and Polyester Filling

To create a bubble quilt, you need three layers of fabric — one for the top layer puffs, one for the bottom of the puffs that you won’t see, and one for the back of your quilt. You also need polyester filling and coordinating thread.

I created a crib-sized quilt and used 1 ½ yards of minky fabric for my puffs, 1 yard of linen fabric for the back of my puffs, and another 1 yard of minky fabric for the back of my quilt. I also used ¼ of a bag of 32 oz Poly-Fil. Obviously, you’ll need more fabric and Poly-Fil if you want to make a bigger bubble quilt.

The following chart will help you determine how many puff squares you’ll need for your bubble quilt so you can calculate your yardage:

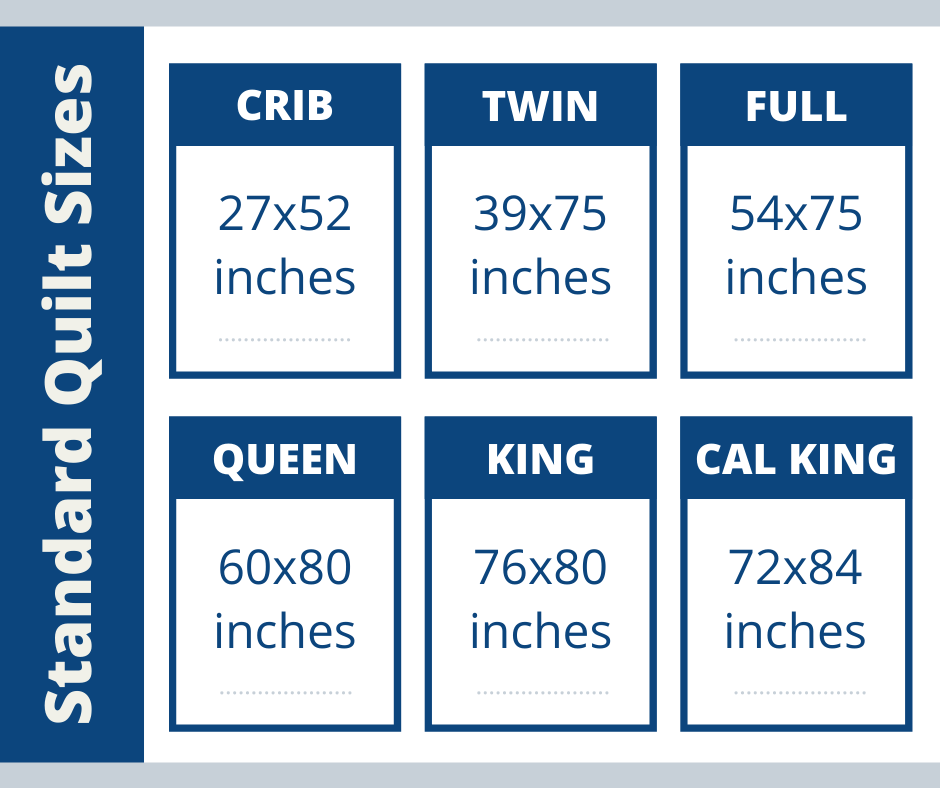
  • Crib: 27x 52 inches (153 squares 9×17)
  • Twin: 39×75 inches (325 squares 13×25)
  • Full: 54×75 inches (450 squares 18×25)
  • Queen: 60×80 inches (540 squares 20×27)
  • King: 76×80 inches (702 squares 26×27)

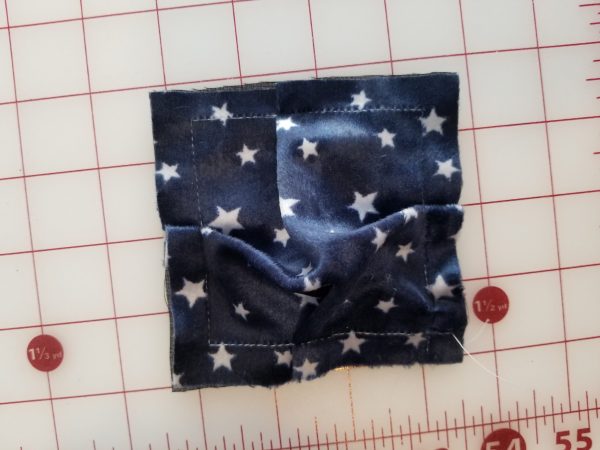
For the puffs, you need to cut 5-inch squares and 4-inch squares. The 5-inch squares are what you’ll see (the puffs). The 4-inch squares will be completely encased in your quilt, so it doesn’t matter what they look like. If you use 1/2-inch seams, each of your puff squares will turn out to be 3 inches wide in the end.

You can make your puff squares larger than 3 inches, but you’ll have to do the math yourself to determine how much fabric you need. Here are the standard sizes of quilts listed on TheQuiltingCompany.com:

  • Facebook
  • Pinterest

BabyCenter.com recommends you don’t use blankets in your child’s crib until they are at least 12 months old. Some parents wait for 18 months. Using blankets before this time increases the chances of SIDS and can also be a strangulation hazard. Until your baby is old enough to use blankets, you should use sleep sacks instead. My newborns loved the swaddle sleep blankets from Swaddle Me, but you can find patterns to make your own sleep sacks, too.

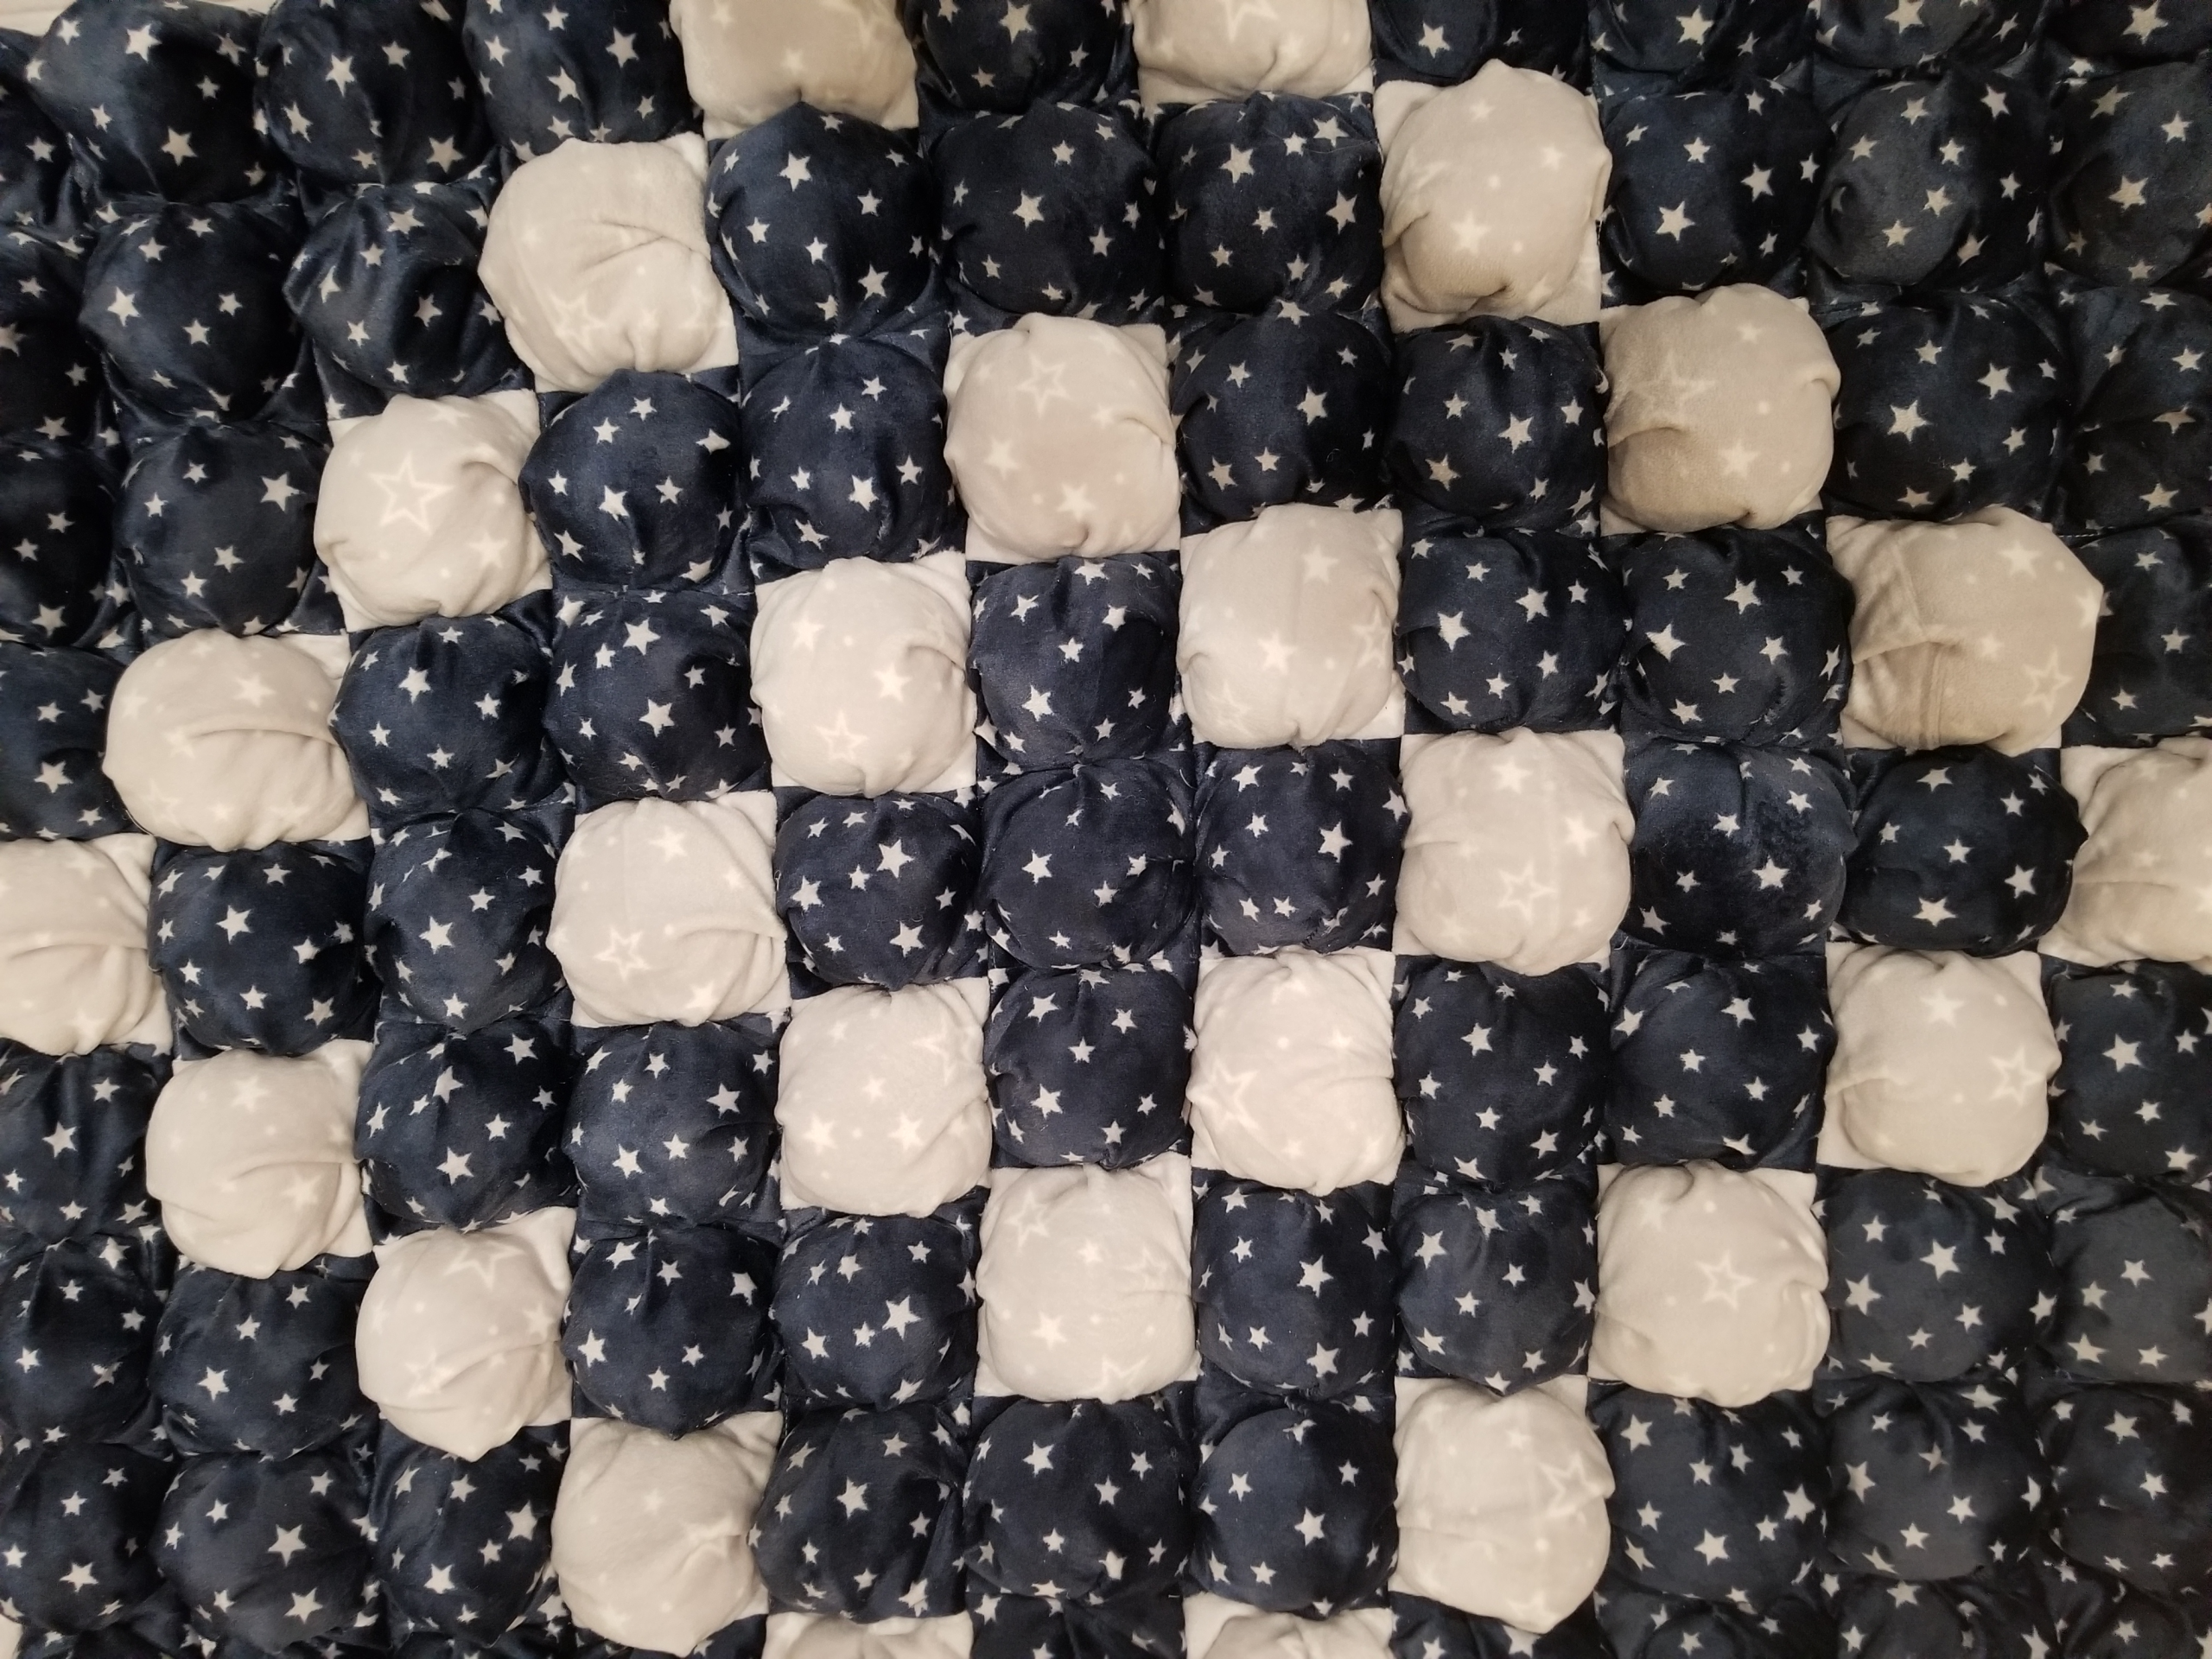
If you want to make a bubble quilt for your baby, keep in mind that you shouldn’t put it in your baby’s crib or use it during sleep time. However, it is great for tummy time and play. I especially love my bubble quilt because I have hardwood flooring throughout my home, and the bubble quilt is a nice place to lay my son down on the ground.

Fat Quarter Shop Daily Flash Sale
  • Facebook
  • Pinterest

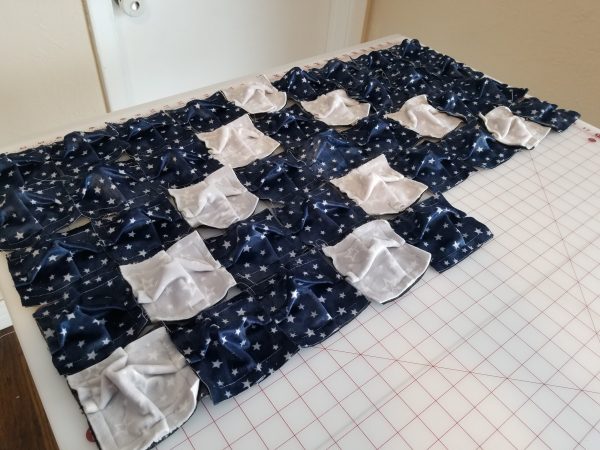
Step 2: Design Your Bubble Quilt

Once you know how many puff squares you’ll need to make, design the layout of your quilt. Get out some graph paper and colored pencils to plan out your design. If you don’t have any graph paper, you can print some for free HERE.

You can’t go wrong with a checkerboard pattern, but your options are practically limitless. I used a simple diamond pattern for my son’s bubble quilt, and I think it turned out cute.

After you’ve designed how you want your quilt to look, count how many squares you need to cut of each color of fabric you’ll be using for your quilt. Then, keep your design handy because it will help you organize your puff squares into rows when you get to that step.

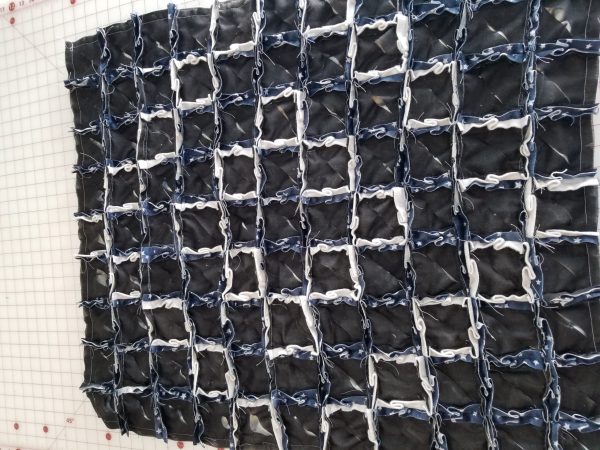
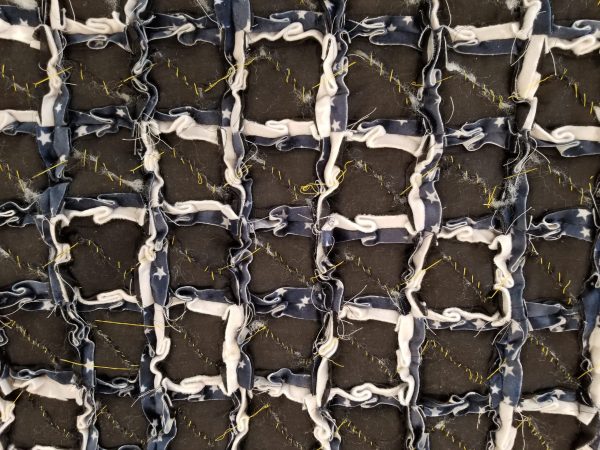
Step 3: Cut Out Your Pieces

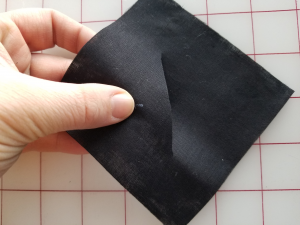
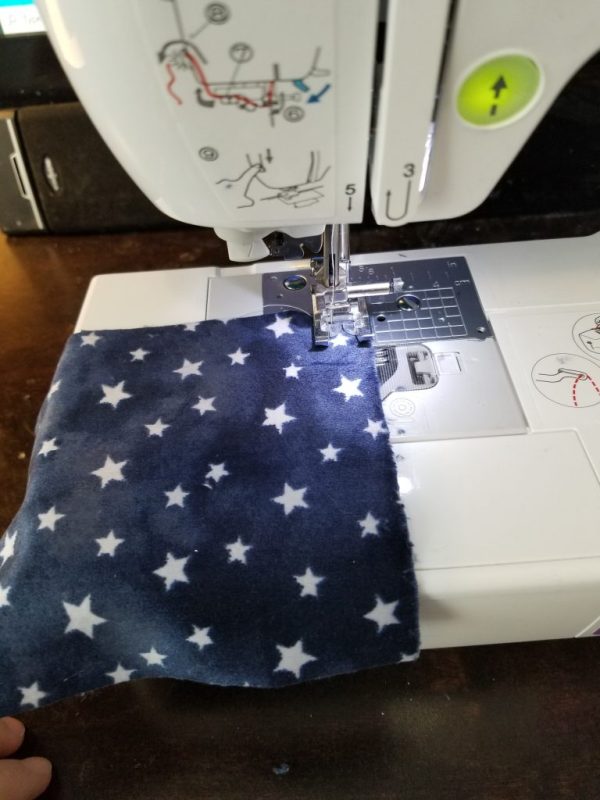
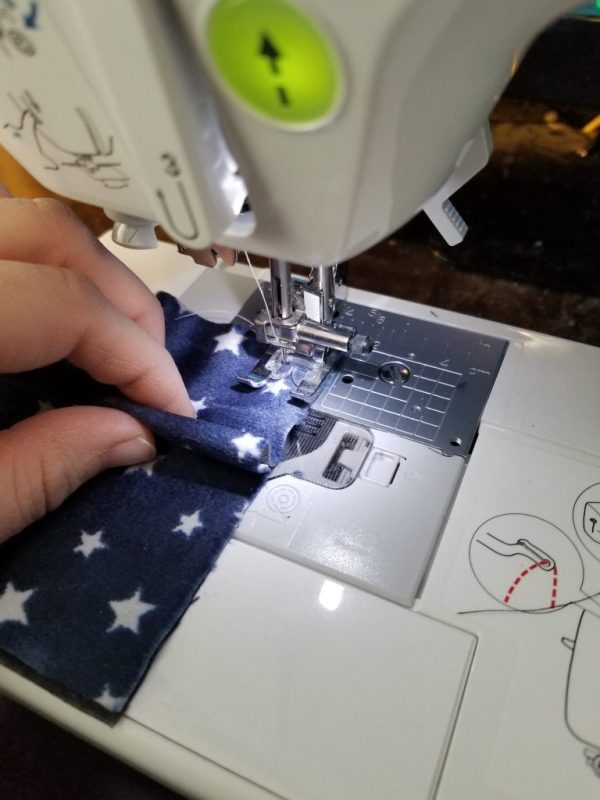
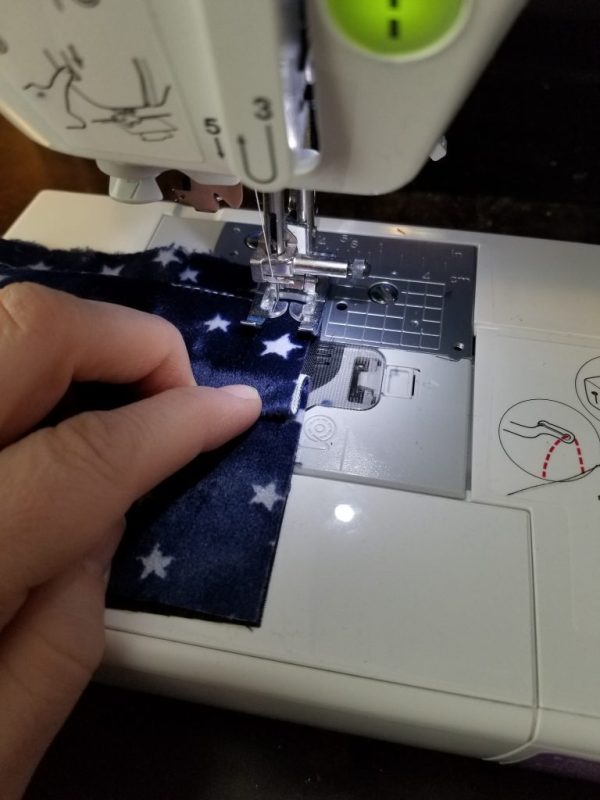
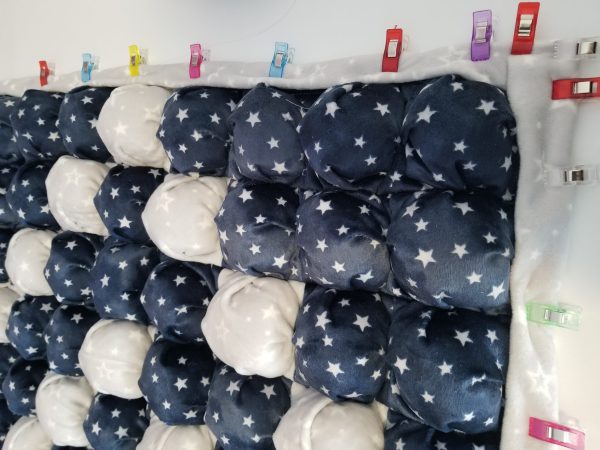
Start by cutting out all the 5-inch squares you need for your top layer of puffs. Try to cut as precisely as possible because it will make your quilt look better when it’s finished. Also, neatly stack all your squares in the same direction so you can sew them together with the nap all going the same way. This is super important if you’re using a fabric like minky or any fabric that has a directional pattern or lots of stretch.

Using a rotary cutter and matt is the easiest way to get your fabric square. I recently bought a new Sew Ready cutting table for my sewing room and a cutting mat that covers the entire top. I love it! If you’re interested, go check out my cutting table review. I think this Sew Ready cutting table is better than the first one I owned by Sullivans.

Also, cut out 4-inch squares for the back of your puffs. I already mentioned that nobody will see these squares because they’ll be completely encased inside your quilt. I do recommend that you use a stiff fabric for your 4-inch squares, like linen or muslin, to help your bubble quilt keep its shape.

You can cut out the back of your quilt at this time, but I like to wait to line it up with my finished bubble puff panel. That way it is the perfect size.

  • Facebook
  • Pinterest
My Bubble Quilt Squares Ready to Sew

Step 4: Sew Your Squares Together

To sew your 5-inch squares to your 4-inch squares, create a small pleat in the middle of each of your 5-inch squares. Instead of pinning, I like to sew an inch, create my pleat, line up the other end of my square, and sew to the end. You don’t need to worry about having your pleats exactly in the middle of your puff squares because you won’t be able to tell too much once you fill all your puffs with Fiber-Fil. I also like to sew two pleats one direction and two pleats the other direction, but this is not necessary.

  • Facebook
  • Pinterest

Slit in Backing

I looked at a lot of tutorials before sewing my bubble quilt. Most bubble quilt tutorials recommended that you stuff your bubbles as you sew your squares together. They want you to sew three sides of your squares, stuff with Fiber-Fil, and then sew the fourth side shut. This does works, but I think there is a better method. Michelle from Happy Squishies recommends that you cut a 2-inch slit in the middle of all your 4-inch backing squares. Then, sew all four sides together. That way you have a slit in the bottom to stuff each puff square all at one time. This does take a little more time because you must close all of your puff squares by hand, but the advantage is that you can add more Fiber-Fil for a puffier quilt. Check out Michelle’s puff quilt tutorial HERE.

Here are Some Pictures to Help You See How to Create the Pleats: 

  • Facebook
  • Pinterest
Sew a Few Stitches
  • Facebook
  • Pinterest
Pinch Center to Create Pleat
  • Facebook
  • Pinterest
Sew Pleat Down

If you add the Fiber-Fil as you sew your squares together, you can’t overstuff your puff squares because it will be impossible to sew them to your next square — things just get too bulky to fit under your presser foot. Plus, adding Fiber-Fil as you sew can get messy.

  • Facebook
  • Pinterest
Completed Puff Square
Note: Two pleats go in one direction and two pleats go in the other direction.

Once all your puff squares are created, line them up into rows and sew them together to create your panel. I used ½ inch seams to connect my puffs. You can use smaller or larger; the important thing is that you are consistent with your seam allowance size throughout your entire project.

  • Facebook
  • Pinterest
Line Up Your Puff Squares
  • Facebook
  • Pinterest
Rows Sewn Together and Ready for Stuffing

Step 5: Stuff and Close Your Bubbles

Take your bubble puff panel, turn it over, and stuff all your squares with Poly-Fil through the 2-inch slit you left in the back of all your 4-inch backing squares. This shouldn’t take too long. I was surprised at how little Fiber-Fil I actually used. I made a small, crib-sized bubble quilt and only needed ¼ of a bag of 32 oz Poly-Fil. I’m guessing one bag is plenty for a twin or queen size bubble quilt.

After all your bubbles are stuffed with poly-fill, use a needle and thread to close up all the slits by hand. This doesn’t have to look pretty because nobody will ever see it. I used a quick whip stitch. Stitching by hand does take some time, but I think it is less hassle than dealing with all the Poly-Fil as you’re sewing your squares together. Plus, when you stuff all your puff squares at the same time, you can make sure they have the same amount of Poly-Fil.

  • Facebook
  • Pinterest
Slits Stitched Closed By Hand

Step 6: Bind Your Quilt

The easiest way to bind a quilt is to cut the fabric for the back of your quilt two inches larger than your puff panel all the way around. Then, all you need to do is double fold and stitch your back fabric over the top of your front fabric to create the binding. I don’t recommend this method if you used minky fabric for both the front and back of your bubble quilt because it’s difficult to sew minky to minky, especially when you add that third layer of minky.

  • Facebook
  • Pinterest
Binding Quilt

There are tons of different ways to bind a quilt. SuzyQuilts.com has an awesome page that shows you how to easily sew binding on a quilt. She explains two different methods, and you can choose the one that will work best for your bubble quilt.

I hope you found this bubble quilt walk-through helpful!

Now, before you run off to the fabric store to get everything you need for a bubble quilt, please be informed that these puff quilts take a long time to make. I spent over eight hours on this little crib-sized bubble quilt for my son. If you want to make something larger, be prepared for the time investment. That’s why people charge $100+ for bubble quilts on Etsy. It’s not that they are difficult to make; just time consuming. If you want a bubble quilt but don’t want to sew it yourself, Happy Squishies will gladly make one for you. I highly recommend this handmade business.

Have you made a bubble/puff quilt? Leave a picture in the comments below and share any insights you have.

Share this post on Pinterest!

  • Facebook
  • Pinterest