January 13, 2026 · Sewing Society · 6 min read · Learn to Sew, Patterns & Projects
Disclosure: As an Amazon Associate, we earn from qualifying purchases. Some links in this post may be affiliate links.
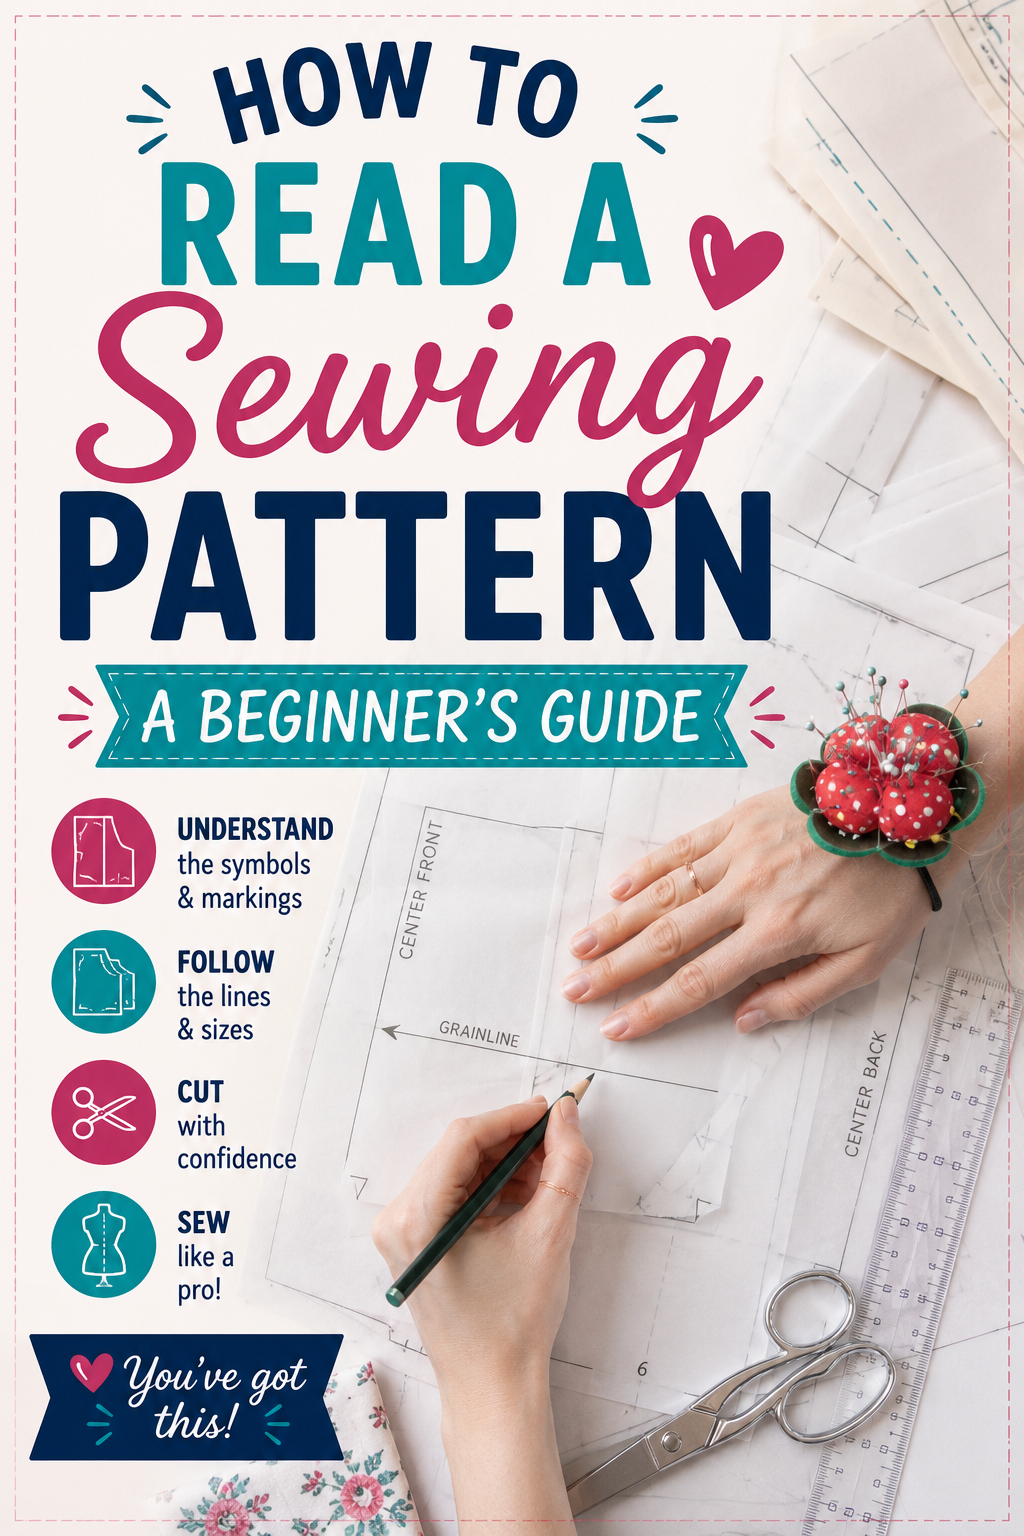
How to Read a Sewing Pattern: A Beginner's Guide
Sewing patterns can look incredibly intimidating when you first open them, but they're much easier to understand than they appear. This beginner's guide walks you through every step of reading a sewing pattern, from finding your size and buying fabric to understanding pattern markings, cutting your fabric, and following the construction steps.
Are you intimidated by sewing patterns?
You're not alone. We've all been there: you open a new pattern full of enthusiasm and find a confusing tangle of lines, symbols, and words you've never heard before.
That's completely normal, and it gets easier every time. This guide is here to help you approach sewing patterns with confidence from the very beginning!
Step 1: Find Your Size
The first thing to do with any new pattern is figure out which size to sew. Look for the size chart on the back of the envelope (or on one of the first pages of a PDF pattern, usually labeled "Body Measurements"). For children's patterns, sizes typically go by height and weight. For bigger kids and adults, you'll need to take your own measurements.
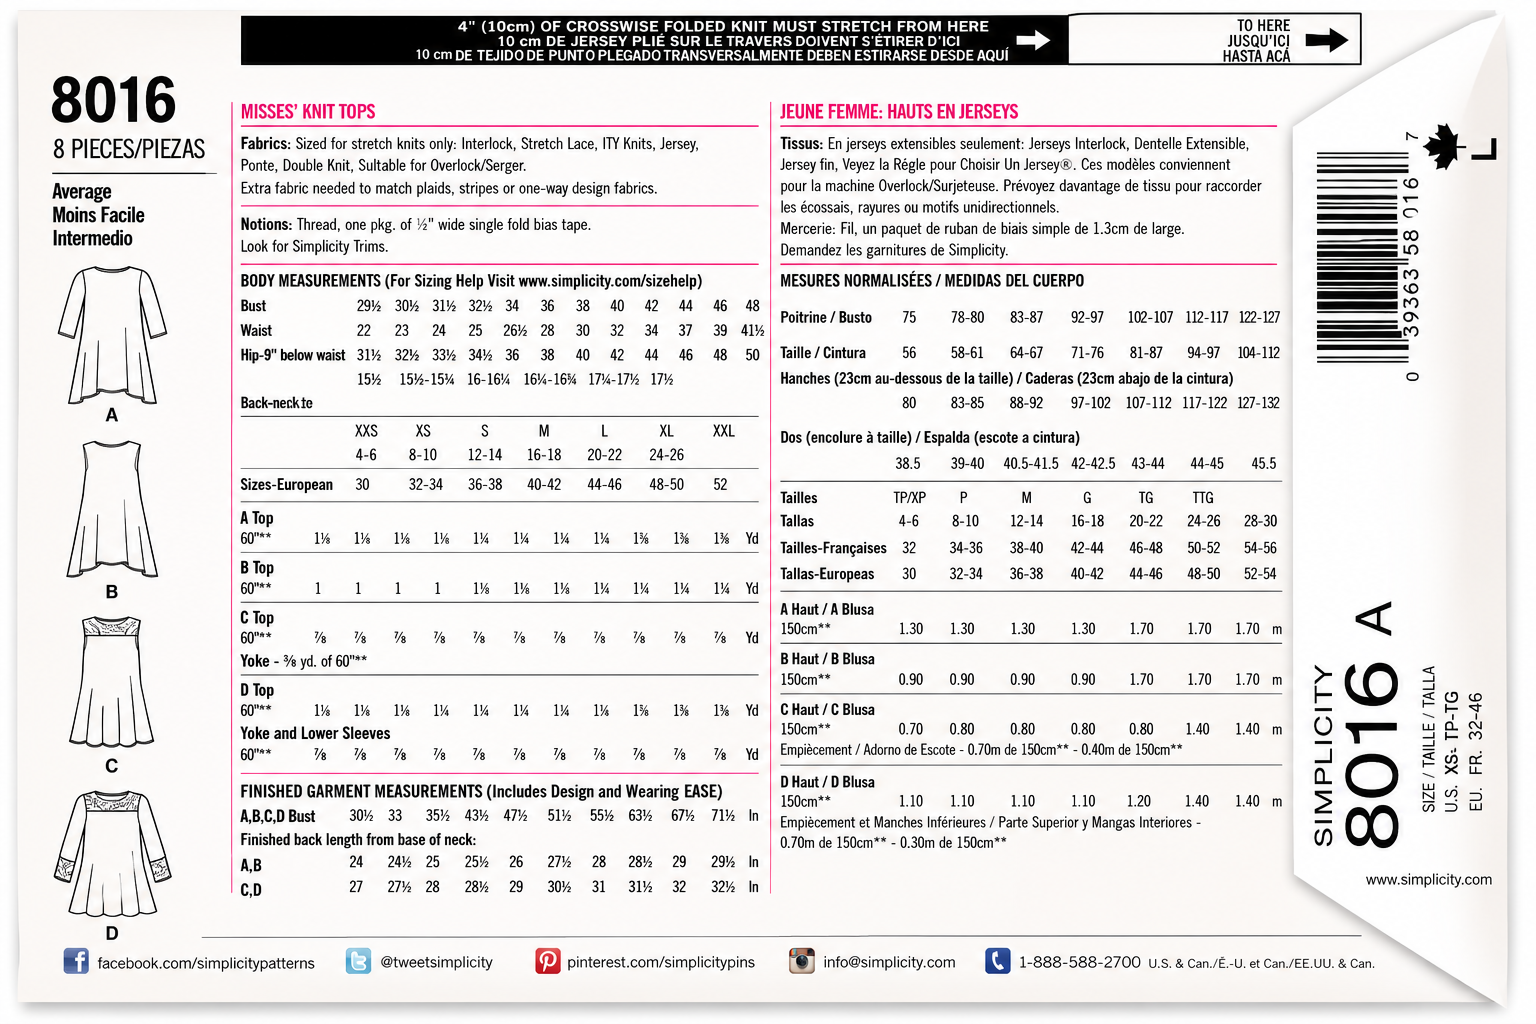
Take your time and measure carefully with a flexible measuring tape. Depending on the pattern, you may need your bust, waist, hips, and height.
It's very common for your measurements to fall across multiple sizes. For example, your bust might be a medium, your waist a large, and your hips a medium. If that happens, you have two options:
Choose the size that fits your largest measurement. It's much easier to take in a seam than to make a garment larger.
Grade between sizes. This is a more advanced skill, but the basic idea is to draw a gradual line from one size marking to another across the pattern piece.
One important reminder: never assume you're the same size in sewing patterns as you are in store-bought clothes. There are no standardized sizes in sewing. Every pattern company measures differently. Always measure yourself!
Step 2: Buy Your Fabric and Notions
Once you know your size and which view you're making, look at the yardage requirements on the pattern. These are usually listed separately for 45" and 60" wide fabric, so double-check which one applies to what you're buying.
A few things to keep in mind:
If your fabric has a directional print, stripes, or nap, buy extra so you can match everything up properly.
I always buy an extra quarter to half yard beyond what the pattern calls for, just in case of mistakes. It makes cutting feel a lot less stressful.
Read the back of the pattern carefully for lining and interfacing requirements.
Pay attention to the suggested fabric types. If your pattern says to use knits, do not substitute a woven. It will not work!
There's also a notions list on the pattern back that will include things like buttons, zippers, elastic, and thread. Write everything down before you go shopping so you don't forget anything.
If choosing fabric feels overwhelming, a sewing subscription box is a wonderful solution. My personal favorite is IndieStitch, which sends you a pattern, fabric, and all the notions you need each month. It takes all the guesswork out of the process!
Step 3: Cut Out Your Pattern Pieces
Unfold your paper pattern and cut out the pieces you need for your chosen view. Your pattern instructions will tell you which pieces to cut, usually listed at the beginning like: "View A: Pieces 1, 2, 4, 6, and 10." You don't have to cut every piece on the sheet, just the ones you need.
If you want to reuse the pattern in a different size later, cut out the largest size and fold the edges down to the size you need when cutting your fabric. It's not the most elegant system, but it keeps all your size options intact.
This is one reason I love PDF sewing patterns: you can print just the size you need and reprint anytime.
PDF patterns do require some assembly: you print on standard 8.5"x11" paper and tape the pages together before cutting. It can be time-consuming for large patterns, but services like PDFplotting.com can print your pattern on large paper for around $3 a sheet, which is a great option for long patterns.
Before you start cutting anything, take a few minutes to read through the entire pattern instructions. It gives you a much clearer picture of how the project comes together and helps you spot any confusing steps before you're in the middle of sewing.
Step 4: Cut Out Your Fabric
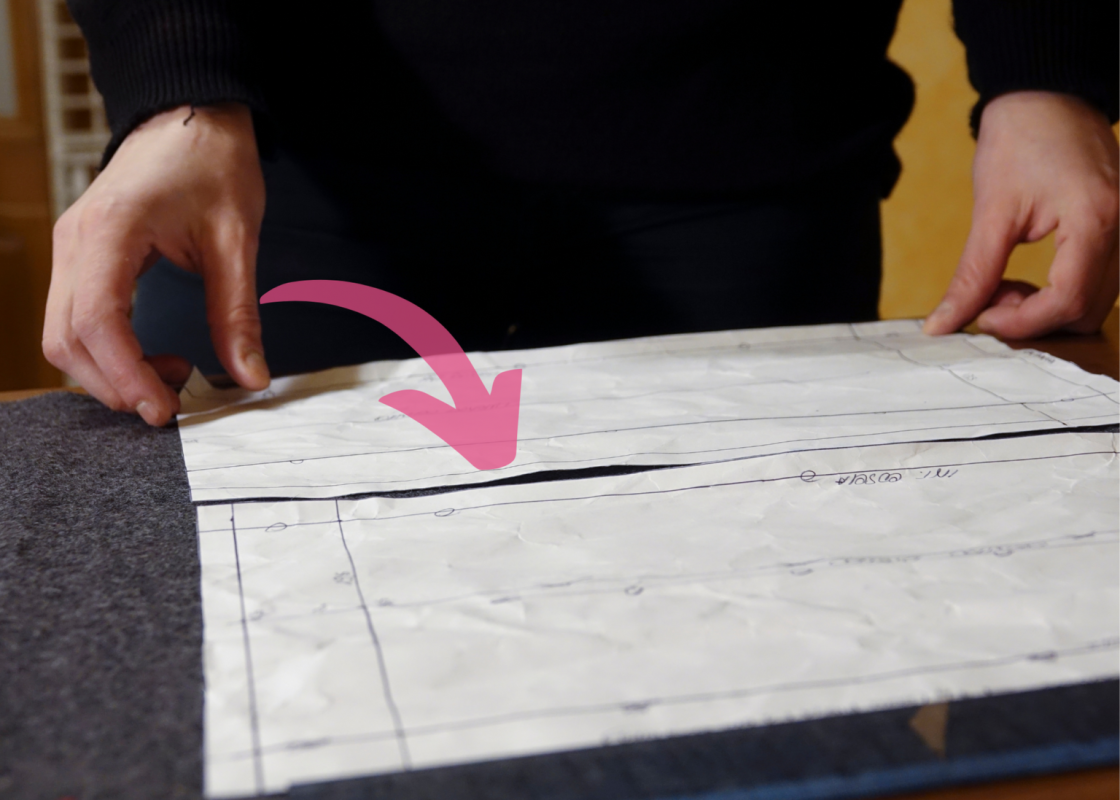
With your pattern pieces ready, it's time to lay them out on your fabric and cut. Prep your fabric first by washing and pressing it if needed.
Use a large flat surface so you can spread everything out at once. You can pin the pattern pieces to your fabric or use pattern weights with a rotary cutter and mat.
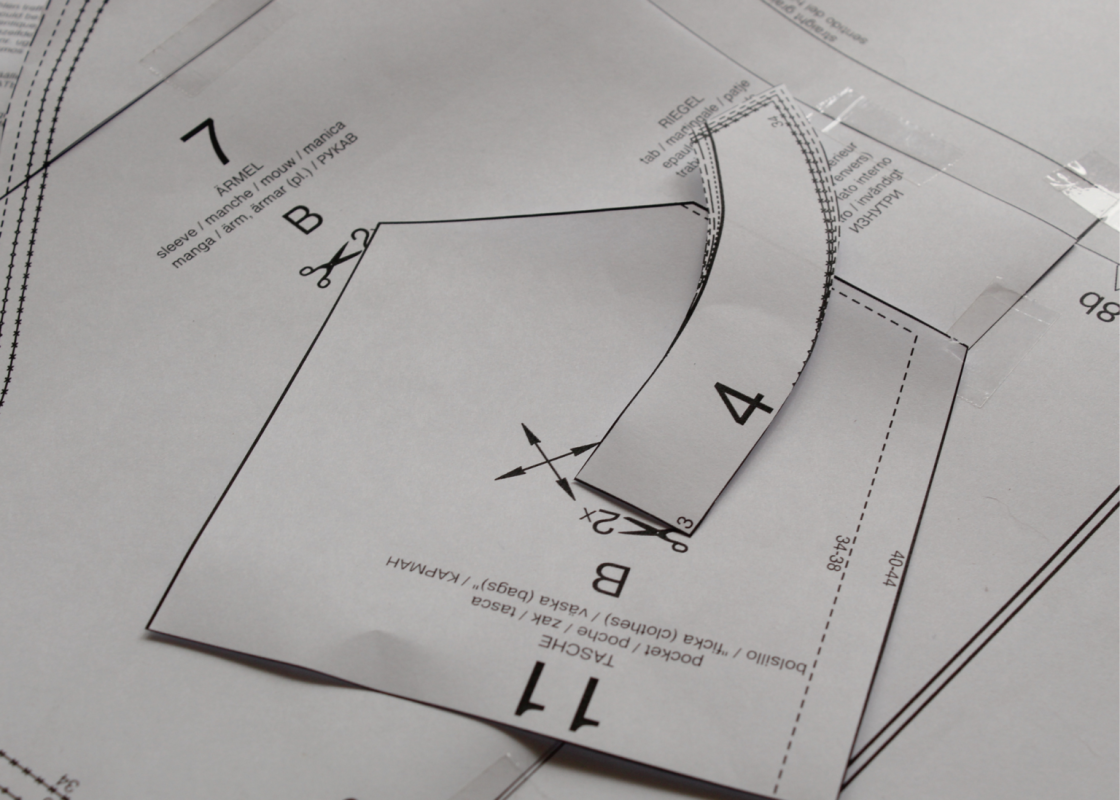
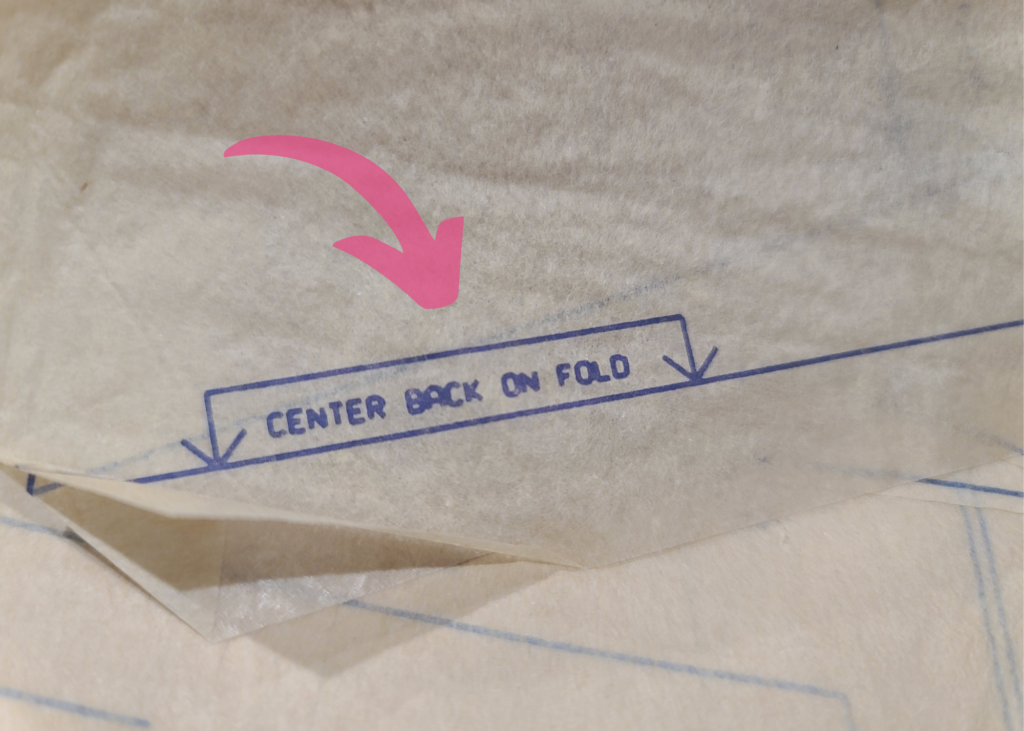
Here are the key pattern markings you need to understand before you cut:
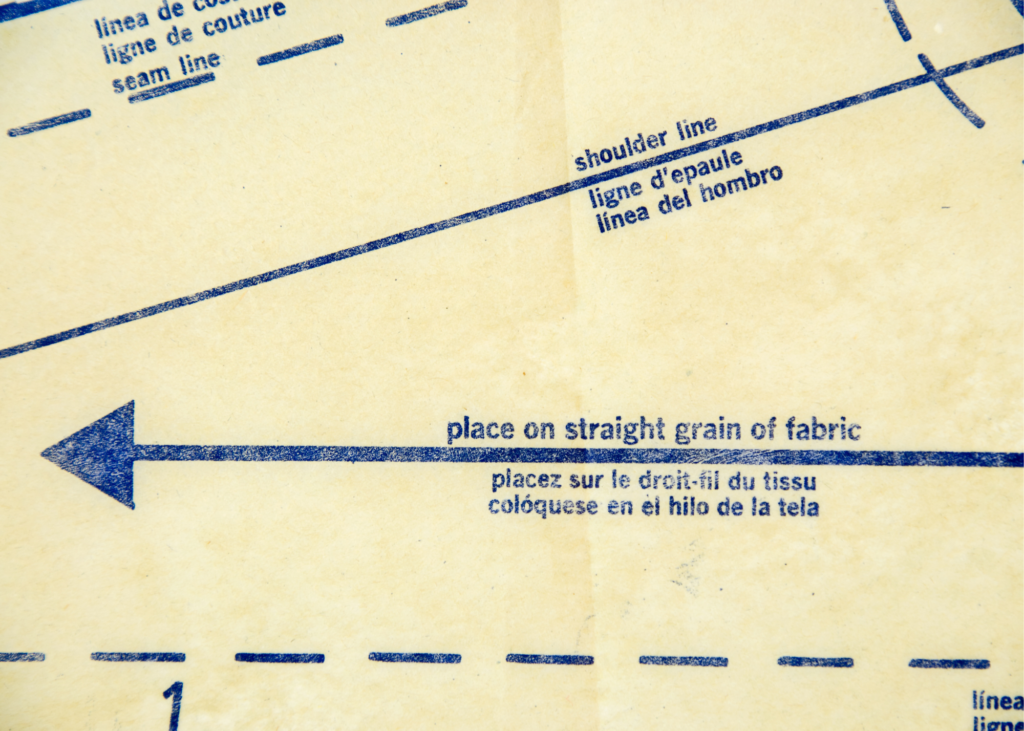
Cut on Fold A double-sided arrow pointing to one edge of the pattern piece. Place that edge exactly on the fold of your fabric before cutting. This gives you one large, symmetrical piece when unfolded.
Grainline A straight arrow, usually in the center of the pattern piece. This should be parallel to the selvage edge of your fabric. Grainline placement affects how your garment hangs and how much it stretches. Never ignore this marking!
Lengthen/Shorten Lines Two parallel horizontal lines indicating where to adjust the length of a pattern piece. To lengthen, cut along the line and add paper between the pieces. To shorten, fold a pleat at the lines (fold half of the total amount you want to remove).
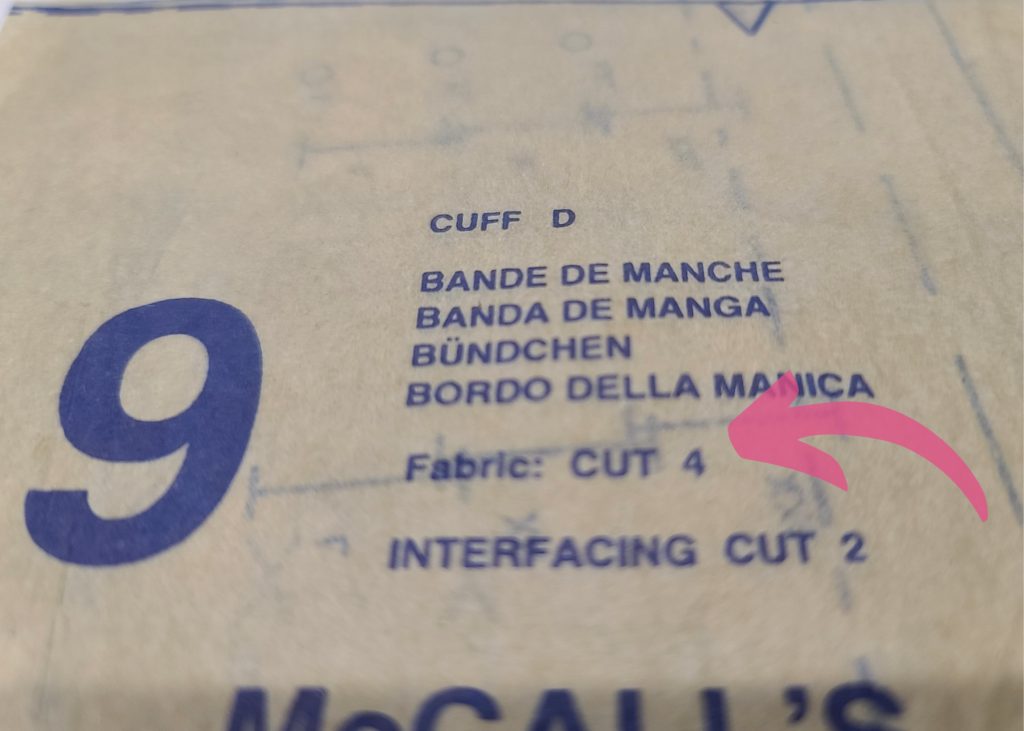
Number of Pieces to Cut Look for notes like "Cut 2" or "Cut 2 mirror." Mirrored pieces mean you fold your fabric right or wrong sides together and cut two pieces from the same pattern piece so they're symmetrically opposite.
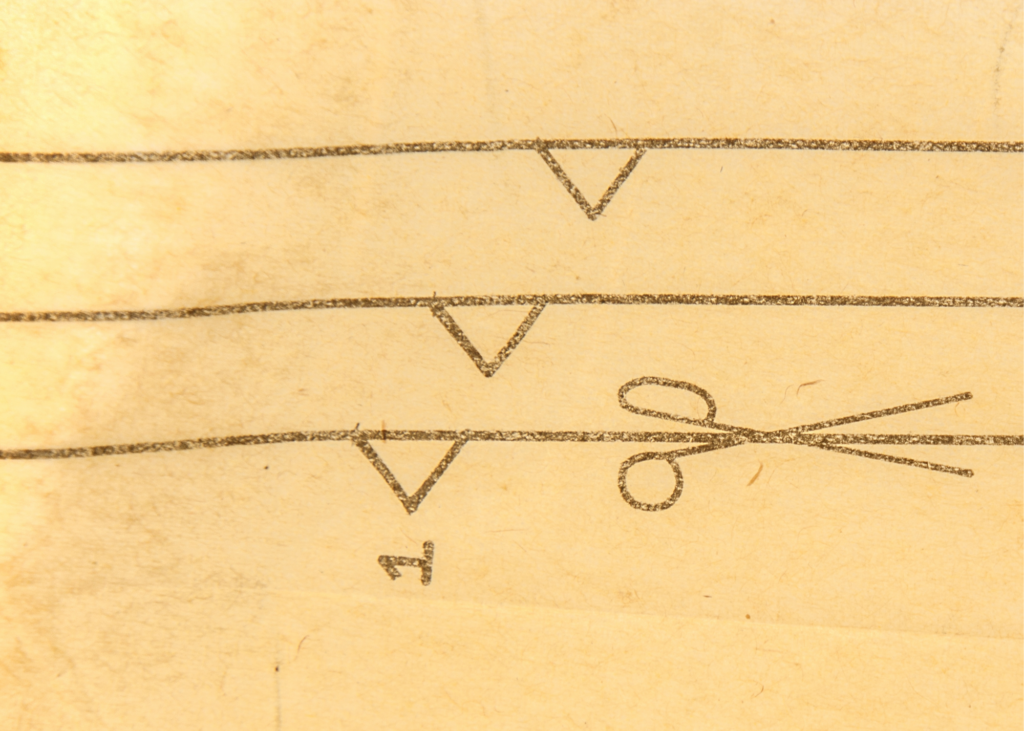
Notches Small triangles along the cutting line that show you where to match up pieces when sewing. Mark them with chalk or a fabric pen when you cut, or clip a tiny snip into the seam allowance at each notch. Single notches are typically on front pieces; double notches are on back pieces.
Also Read: Sewing Pattern Symbols Explained
Step 5: Construct Your Garment
Now for the fun part! Most patterns come with detailed step-by-step instructions, often with pictures. Start at step one and work your way through, keeping track of which view you're sewing so you can skip any steps that don't apply.
Here are a few sewing terms that come up often in pattern instructions:
Right Side / Wrong Side The right side of fabric is the "outside" or decorative side. The wrong side is the inside. When a pattern says "right sides together," it means you're placing the pretty sides face to face so the seam ends up on the inside of the finished garment.
Gathers Marked with a straight or wavy line between two dots. To create gathers, sew a long basting stitch between the two points without backstitching, then pull the thread end to bunch the fabric up. Spread the gathers evenly before sewing them to the corresponding piece.
Darts and Pleats Darts are shown as a dashed triangle on the pattern piece. They create shaping in the bust, shoulders, or waist. To sew a dart, fold the fabric on the fold line of the triangle with wrong sides together and sew along the stitching line. Pleats work similarly, folding fabric to create volume or shape.
Step 6: Show It Off!
Once your project is complete, celebrate! Sewing something from a pattern is a real achievement, especially the first few times.
 Pin It
Part of the joy of sewing is sharing what you've made. Post pictures of your finished projects in the Sewing Society Facebook Group or in our Forum! There's nothing quite like hearing "I made that" and really meaning it.
Have questions about reading a sewing pattern? Ask our AI Sewing Coach (Bottom right of screen).
Related reading: What's a Muslin? (And Why Experienced Sewists Swear By Them)
AI Sewing Coach
Create a free account to chat with our AI Sewing Coach — trained to help with sewing techniques, troubleshooting, projects, fabric questions, and more!
Comments
Comments are screened by an AI moderator for spam and inappropriate content.
Sign in to join the conversation.
Loading comments…