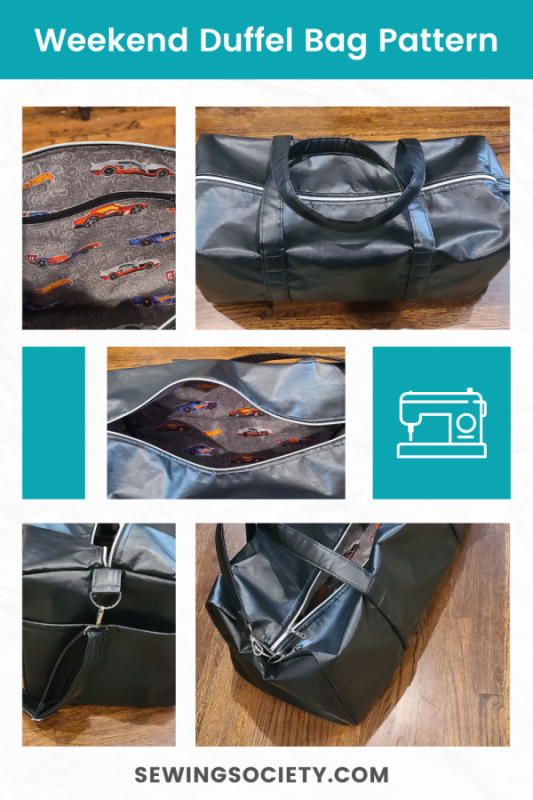
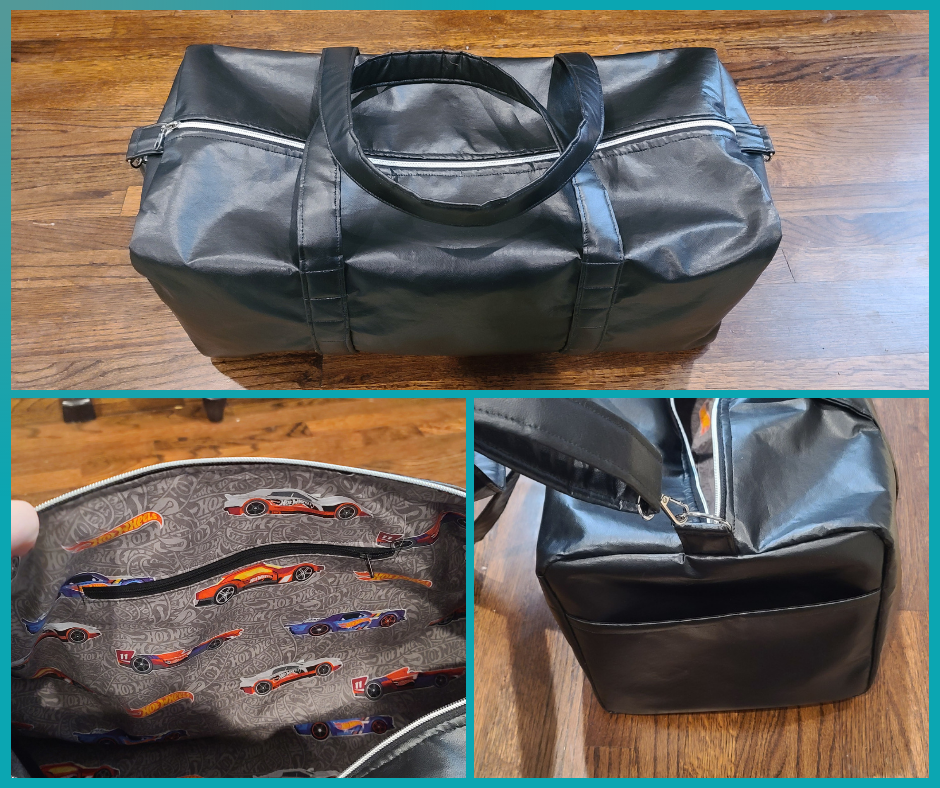
I just finished sewing the Wanderlust Duffel Bag from Peek-a-Boo Pattern Shop. It’s an easy weekend bag pattern with lots of versatility.
I used faux leather for the exterior and a fun Hot Wheels fabric for the lining. The hardware came from Sallie Tomato (1.5” bag kit), and I finished it off with a Hot Wheels keychain.
This large duffel bag is going to my father-in-law for his birthday. He always plays Hot Wheels with my boys, so I thought it would be fun to personalize this duffel bag pattern for him.
Here are some pics of the finished weekend bag:
Wanderlust Duffel Bag Pattern Review
CLICK HERE to get the Wanderlust Duffel Bag pattern from Peek-a-Boo Pattern Shop.
Pattern Description: Weekend bag pattern with four size options — 12”, 16”, 20”, or 24”. You can also choose round or rectangular end caps and several pocket options.
Time to Sew: 6 hours
Difficulty: Intermediate
Format: PDF (Regular 8.5×11) Instant Download, AO Paper, and Projector Files
Here are the notions you’ll need to buy to sew the largest version of this weekend bag pattern:
- 2.5 yards of fabric for the exterior
- 1.5 yards of fabric for the lining
- 1 yard of fusible fleece
- 24” zipper (heavy duty)
- 1.5″ D-rings, swivel hooks, and strap adjustor (Sallie Tomato level 3 bag kit)
- 5 yards of webbing (optional)
- 3 yards of double fold bias tape
I made the 24” duffel bag with rectangular end caps because I thought it would look more masculine. It is very large! It is the perfect weekend bag pattern.
Since I was using faux leather, I chose to make fabric straps and omit the side stripe of fabric because I thought it would add too much bulk. I also didn’t need to use fusible fleece because my faux leather had a thick backing.
The Wanderlust Duffel Bag pattern is easy to follow, but I rated it intermediate because of the bias tape and the difficulty that comes from sewing around the corners on the end caps. I do think a beginner could sew this duffel bag pattern, though, because there is a video tutorial included.
The only modification I made to this weekend bag pattern was to change the location of the end tabs for the shoulder strap. I sewed them directly into the side seam instead of on the end cap only. I thought it would provide more stability. This did make the seams very bulky, but I was able to make it work.
Overall, I really liked this duffel bag pattern and I plan to make more. I feel like the 24” is perfect for weekend trips, but I’d probably make the 16” or 20” for a gym bag. The 12” duffel bag would be perfect for kids.