August 1, 2026 · Sewing Society · 4 min read · Embroidery
Disclosure: As an Amazon Associate, we earn from qualifying purchases. Some links in this post may be affiliate links.
What Is an In-the-Hoop Embroidery Design?
In-the-hoop (ITH) embroidery designs let your machine do more than just decorative stitching, it builds the whole project inside the hoop. Here's exactly how ITH works, why sewists love it, and what you can make.

If you've spent any time browsing embroidery designs online, you've probably run into the term "ITH" or "in the hoop." It sounds technical, but the concept is actually pretty simple once you see it in action, and it might change the way you think about what your embroidery machine can do.
In-the-Hoop, Defined
An in-the-hoop (ITH) design is a machine embroidery project that's created and finished almost entirely inside the embroidery hoop, without pulling the fabric out to sew it together on a regular sewing machine. Instead of just stitching a design onto a piece of fabric and calling it done, ITH files build the whole item, stitches, appliqué, seams, even zippers or pockets, using the embroidery machine itself.
Compare that to traditional embroidery: you hoop your fabric, stitch out a design, and then you're the one who cuts, sews, and assembles whatever you're making. With ITH, the machine does most of that assembly work for you, following instructions built right into the digital file.
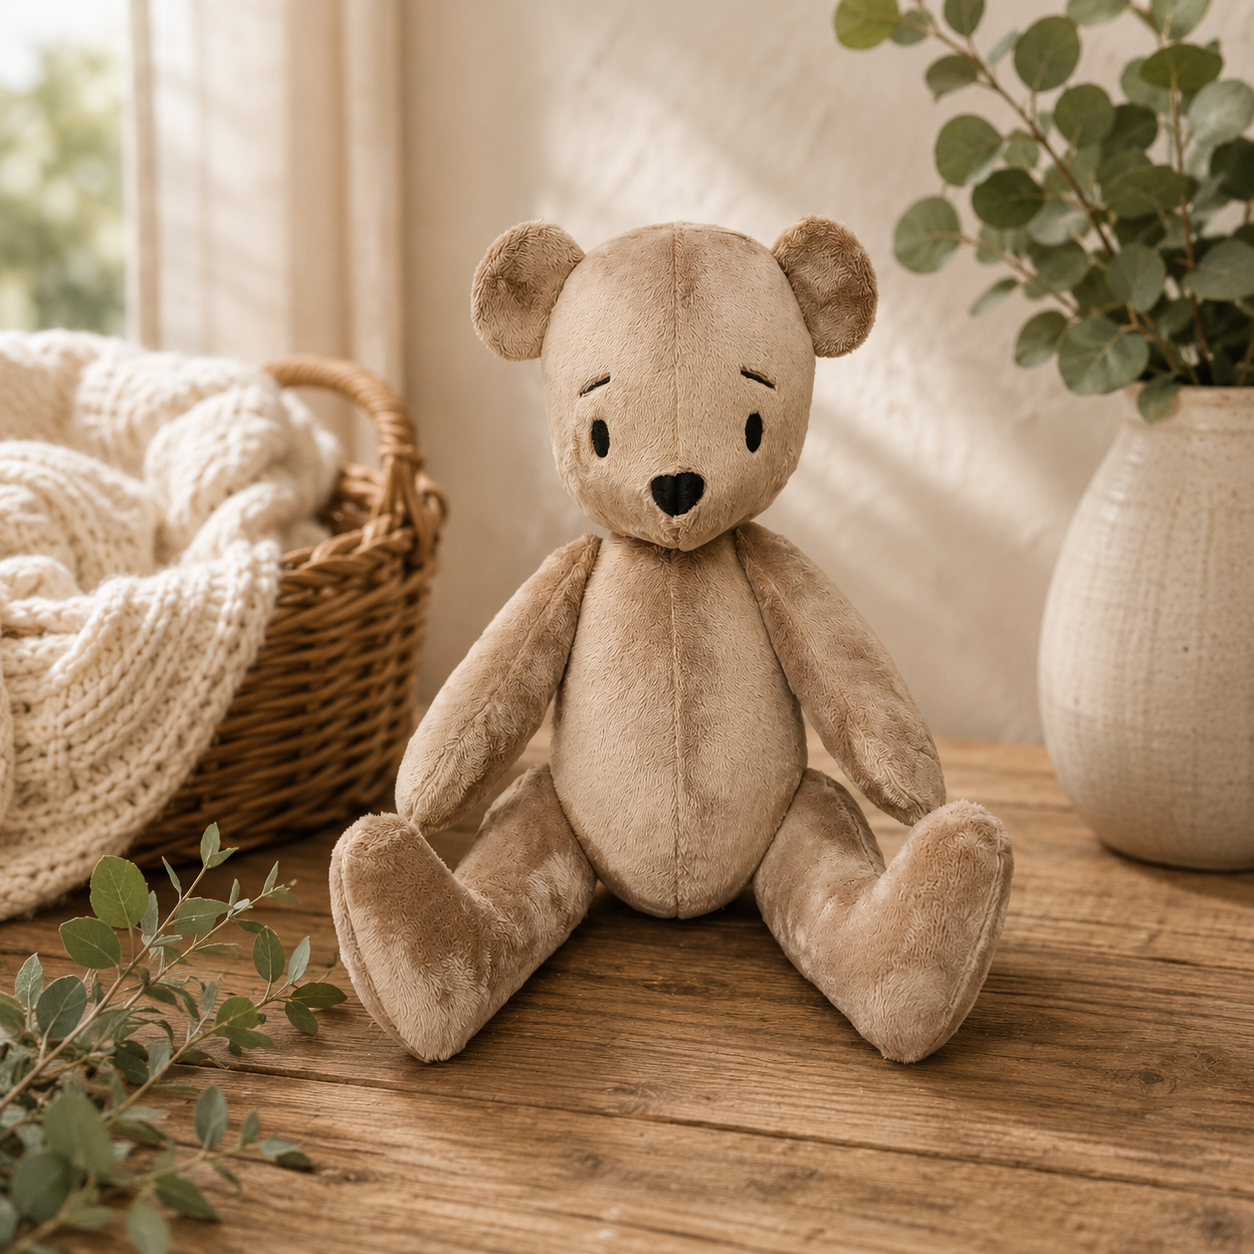
It leads to some pretty impressive results. This is my favorite in-the-hoop embroidery design at the moment: A teddy bear with doll joints for the arms, legs and head:
How In-the-Hoop Projects Actually Work
Here's what the process looks like from start to finish:
1. The design file itself ITH designs are created in embroidery digitizing software, where the designer plots out every step: the stitching, the placement of fabric pieces, the appliqué cutting lines, even where a zipper needs to sit. All of that gets built into one embroidery file.
2. Hooping You hoop your fabric (and often a stabilizer) just like you would for any embroidery project, making sure everything is taut and secured. Then you follow all the instructions you are given.
3. Stitching it out Your machine reads the file and stitches in sequence. Depending on the design, this might include placement lines, tack-down stitches for appliqué fabric, decorative stitching, and structural seams that hold pieces together. It is much easier than it sounds.
4. Mid-project prompts Most ITH designs pause partway through so you can add something, like laying down a piece of appliqué fabric, tucking in a zipper, or trimming jump stitches, before the machine continues.
5. Finishing in the hoop Once the last stitch is done, the project is largely completed right there in the hoop. Many ITH designs are stitched entirely closed and turned right-side out before you even remove them.
6. Final touches Some projects need a little work after they come out of the hoop: trimming stray threads, cutting away excess stabilizer or fabric, or a quick pass of pressing.
Why Sewists Love In-the-Hoop Designs
ITH has a loyal following for good reason:
Precision. The machine handles the assembly, so seams and placement come out consistent every time.
Speed. A project that might take an hour of cutting and sewing by hand can often be finished in one hooping session.
Beginner-friendly. You don't need advanced sewing skills to get a clean, finished result, which makes ITH a great entry point for newer embroiderers.
No sewing machine required. Since assembly happens in the hoop, you can make a fully finished item using only your embroidery machine.
What Can You Make With ITH Designs?
In-the-hoop patterns cover an enormous range of projects, including:
Patches and appliqués
Coasters and mug rugs
Keychains and bag tags
Zipper pouches and cosmetic bags
Tote bags and totes with pockets
Stuffed toys and softies
Ornaments
Bookmarks
Reusable household items
If you can imagine it as a small, finished fabric item, there's a good chance someone has digitized an ITH version of it.
Getting Started With In-the-Hoop Embroidery
If you want to try ITH for yourself, a few things will make the process smoother:
Read the instructions first. ITH designs almost always come with a project sheet explaining hoop size, stabilizer, materials, and any special steps. Read it before you start stitching, not while the machine is running.
Use the right hoop size. ITH files are digitized for a specific hoop, so double check the design fits your machine before you buy.
Stock up on stabilizer. Because these designs do double duty as both embroidery and construction, they tend to use more stabilizer than a simple decorative design. Tear-away and cut-away stabilizers are both common depending on the project.
Have your tools nearby. Small scissors for trimming, appliqué fabric, and any hardware called for (zippers, snaps, key rings) should be within reach so you're not scrambling mid-stitch.
 Pin It
Start simple. Coasters and patches are a great first project since they don't involve tricky elements like zippers or multiple fabric layers.
In-the-hoop embroidery is one of those techniques that feels like a bit of magic the first time you try it: fabric goes into the hoop, and a finished item comes out. Whether you're making quick gifts, building up inventory for a craft fair, or just want a low-fuss way to use your embroidery machine, ITH designs are worth adding to your sewing toolkit.
AI Sewing Coach
Create a free account to chat with our AI Sewing Coach — trained to help with sewing techniques, troubleshooting, projects, fabric questions, and more!
Comments
Comments are screened by an AI moderator for spam and inappropriate content.
Sign in to join the conversation.
Loading comments…