December 28, 2025 · Sewing Society · 2 min read · Fabric Guides
Disclosure: As an Amazon Associate, we earn from qualifying purchases. Some links in this post may be affiliate links.
How to Use Tricot Interfacing: Everything You Need to Know
Interfacing is one of those steps a lot of sewists skip, but it makes a huge difference in how a finished garment looks and holds its shape. Tricot interfacing is my favorite because it works with both knit and woven fabrics without adding bulk. Here's how to apply it correctly in six easy steps.
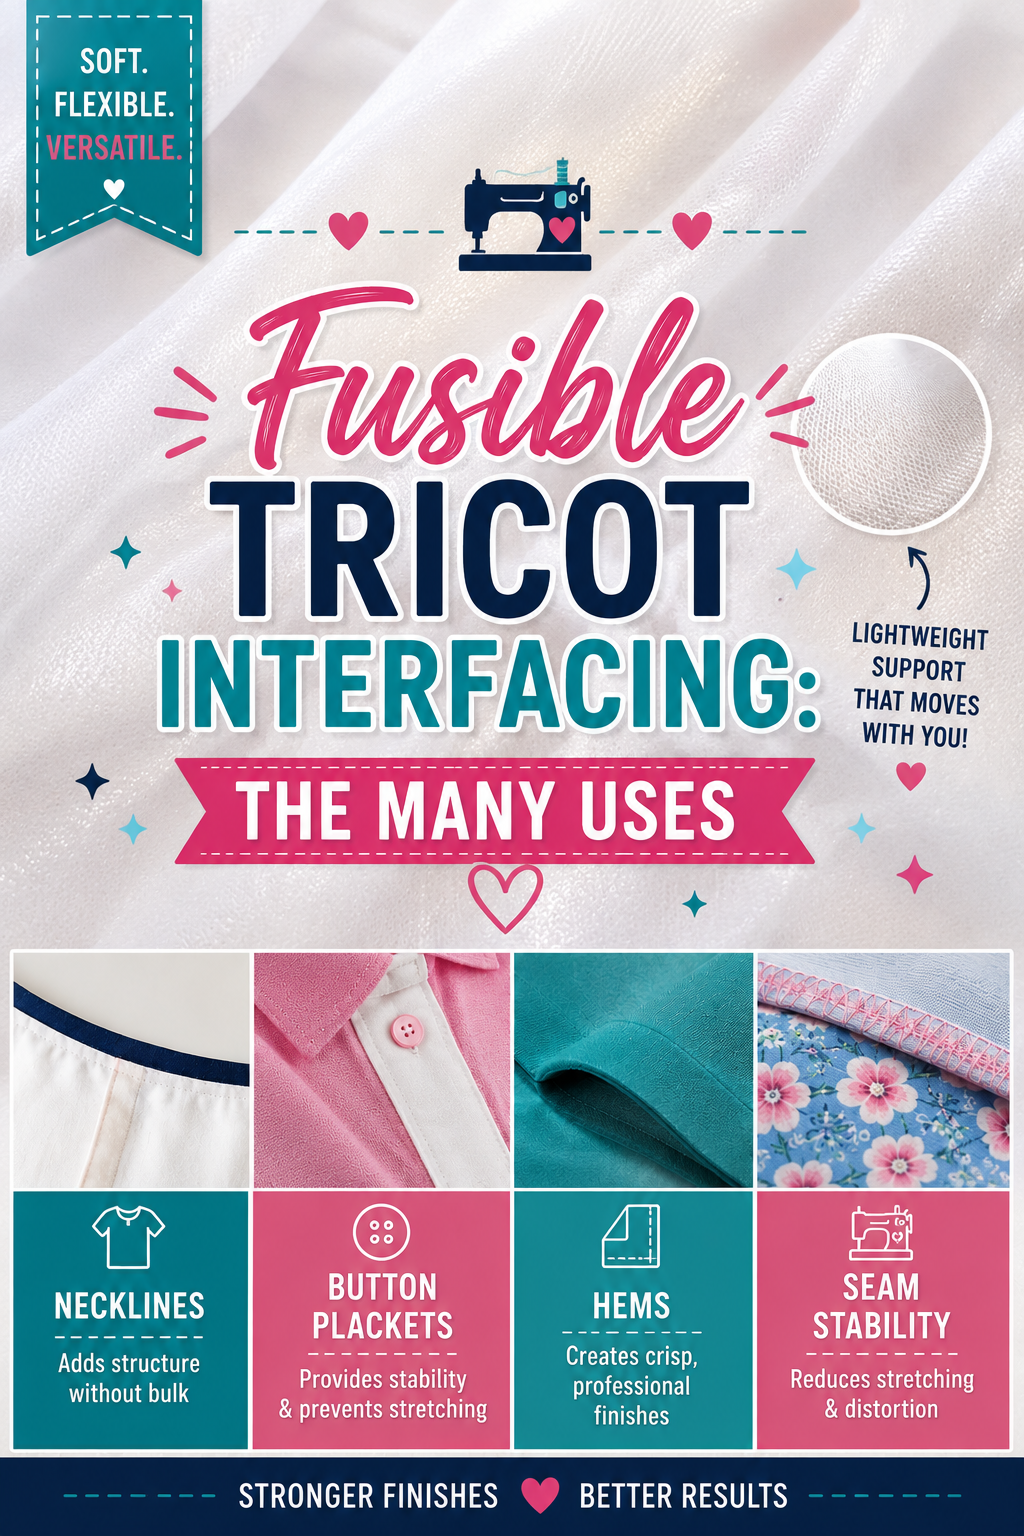
Lots of sewing patterns call for interfacing, and for good reason. It provides stability to collars, front facings, hems, and parts of bodices, hoods, and sleeves. Without it, garments can look limp and lose their shape quickly.
Tricot interfacing is my absolute favorite, and I think once you try it, you'll feel the same way!
What Makes Tricot Interfacing Special?
Tricot interfacing is incredibly versatile. It's traditionally used to stabilize knit fabrics because it has a bit of stretch, but it works beautifully with woven fabrics too.
What I love most about it is that the non-fusible side is super smooth and comfortable against your skin. It adds support, shape, and body to a garment without adding a lot of bulk. When your garment is finished, the interfacing will be hidden by the lining, but it makes a noticeable difference in how the finished piece looks and feels.
How to Apply Fusible Tricot Interfacing
Applying tricot interfacing is not difficult, but I always recommend testing it on a scrap of your fabric first before applying it to your actual project. Every fabric is a little different!
Step 1: Preshrink Your Interfacing Some brands recommend preshrinking tricot interfacing by dipping it in warm water and letting it air dry. It doesn't shrink much, so you can probably skip this step, but it's a good habit for delicate or expensive fabrics.
Step 2: Cut According to the Grain This is the most important step. Tricot interfacing has a grain, and the lengthwise grain has less stretch. Line up your pattern pieces along the grainline before cutting, with the stretch running across your body.
Step 3: Position and Pin Place the fusible side of the interfacing against the wrong side of your fabric and pin it in place.
Step 4: Steam Baste the Edges Using just the tip of your iron, quickly apply heat to the outer edges of the interfacing to hold it in place temporarily. Then remove the pins.
Step 5: Cover with a Damp Press Cloth This step is important! Tricot interfacing is heat sensitive and can melt under high temperatures. Always place a damp cloth between your iron and the fabric before pressing.
Step 6: Press Firmly for 10 Seconds at a Time Set your iron to the wool setting and press down firmly, holding for about 10 seconds before moving to the next section. Work your way across the entire piece until the interfacing is fully bonded to your fabric.
A Few Extra Tips
You'll be surprised at what a difference interfacing makes. It helps your garments drape better, hold their shape, and honestly makes them easier to sew too.
 Pin It
One extra tip I love: apply a small piece of tricot interfacing behind any grommets or buttonholes. The extra stability makes them look so much cleaner and more professional.
If you haven't tried tricot interfacing yet, pick some up for your next sewing project. It's one of those supplies that quietly improves everything!
Related reading: How to Sew Rayon Spandex Jersey (Tips and Tricks)
AI Sewing Coach
Create a free account to chat with our AI Sewing Coach — trained to help with sewing techniques, troubleshooting, projects, fabric questions, and more!
Comments
Comments are screened by an AI moderator for spam and inappropriate content.
Sign in to join the conversation.
Loading comments…